![]() Cross-platform transfer solution for all smartphone users to transfer content between Android and iOS, transfer data from iTunes, iCloud, iTunes library to mobile phone.
Cross-platform transfer solution for all smartphone users to transfer content between Android and iOS, transfer data from iTunes, iCloud, iTunes library to mobile phone.
![]() > How-To > How to Transfer Music from the iPhone 12 to Your PC
> How-To > How to Transfer Music from the iPhone 12 to Your PC
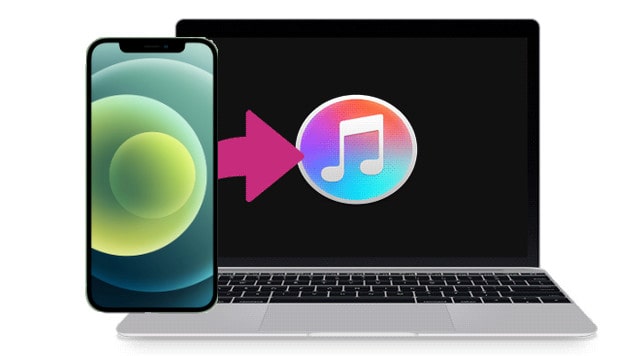
How to Transfer Music from the iPhone 12 to Your PC
Getting your iPhone music to a computer is the suggested way to backup your precious songs or share them to other devices. It's easy to get your music from iPhone to Mac since they are using the same entire Apple ecosystem. So when you need to copy music from your iPhone 12 or iPad to a Windows laptop or desktop PC, it may seem puzzling. But don’t worry, there are always solutions -- you don't need any special tech knowledge to do that. In this article, we will cover the three easiest and quickest ways to transfer music from iPhone to a Windows PC.
Solution 1: One-click to Get All Music Files from iPhone 12 to PC
We can get all music files on iPhone 12 to your pc just 1-click with the help of a mobile transfer tool. In fact, it is the backup feature of PanFone Mobile Data Transfer. This iPhone transfer is designed for transferring data among iOS/Android devices, iTunes and computer. It can easily transfer all your data or only photos from your iPhone 12 to your PC. It can:
- 1-Click to Back up Phone Data to Computer
- Retrieve Data from iTunes/iCloud/Local Backup to iOS or Android devices.
- Transfer Data Between Phones Selectively
- Sync Media Files And Playlists from iTunes Library to Computer and Device
- Supported file types include photos, DCIM, audio, video, contacts, SMS, call logs, WhatsApp messages, Ebook, notes, bookmarks, Safari history, voicemails, and apps.
- Cross-platform supported, compatible with Android 11 and the latest iOS 14.
You can download it by clicking the following button.
Download
Win Version
Download
Mac Version
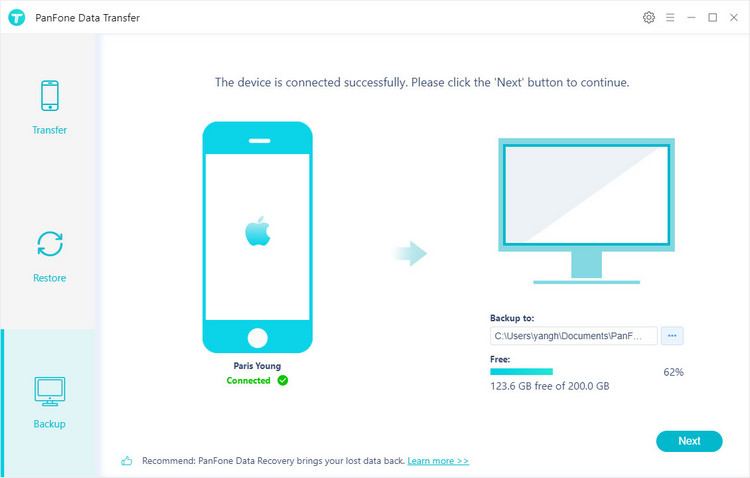
Step 1: Start this program when the installation finishes. Connect the iPhone 12 to the computer via a USB cable. As soon as you connect the device, please unlock the iOS device and choose "Trust" on iOS device. Any detection problem, please check this tutorial.
Step 2 : Select the "Backup" option to bring up the one-click backup panel.
Once your iPhone gets detected, simply select the Backup option and then click on Next button to go ahead.
Step 3 : Tick off "Audio" on the check box, then click on "Next" to start loading.
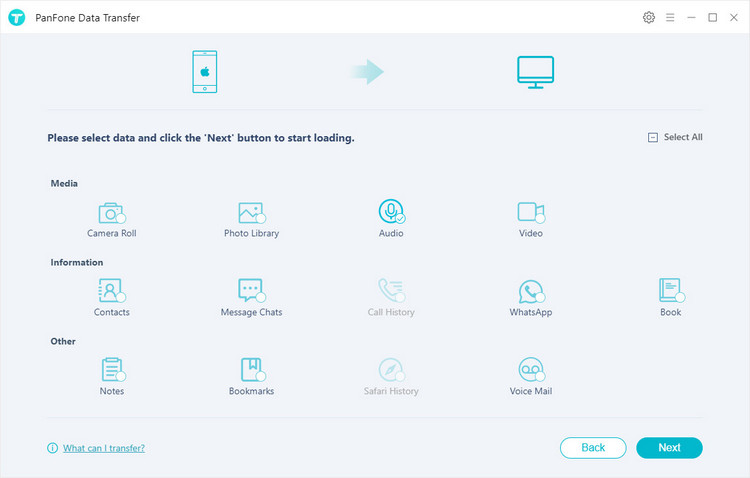
After the loading process is complete, click on "next" to start the backup process.
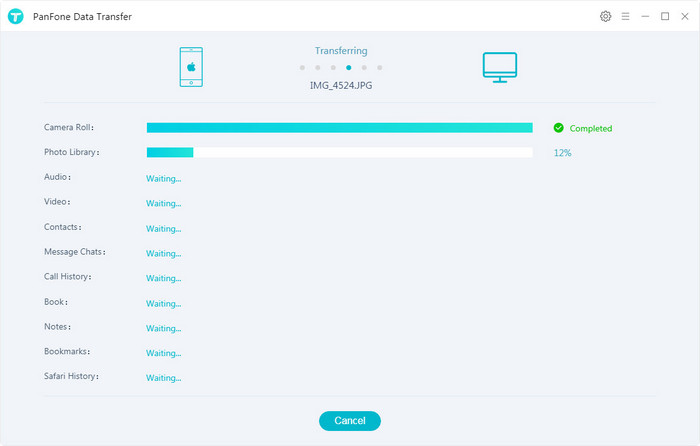
After a while, all audio files will be transferred from your iPhone to the computer.
Solution 2: Import Music files from iPhone 12 to PC Via USB Connection (iTunes needed)
As we know, we can transfer music from iPhone to a computer for free using iTunes. But you would only be able to transfer purchased songs from iPhone to the computer. Learn how to transfer music from iPhone to PC by following these steps:
- Step 1. Make sure you've got the latest version of iTunes installed on the computer. iTunes 12.5.1 or later is required for importing photos this way.
- Step 2. Once the preparation work is ready, connect your Lightning-to-USB cable to the PC. You may need to unlock the phone and verify "Trust This Computer" when prompted.
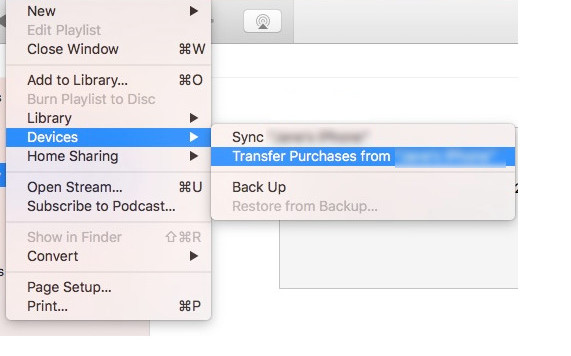
- Step 3. Open iTunes and go to its File menu and click on the option of "Transfer purchases from the iPhone". Since the purchased files are encrypted, sometimes iTunes might ask you to authorize your computer to play them. To do this, go to the Accounts > Authorization and choose to Authorize the computer.
By following this solution, you would be able to transfer songs from iPhone to a computer that is already purchased on your device.
Solution 3: Transfer Music from iPhone to PC Selectively
If you only want to transfer some special songs to the pc, you need an iPhone data manager instead of iTunes. We recommend PanFone Mobile Manager. It enables you to freely manage, transfer, backup, restore and delete iPhone data via the computer.
Step 1: Download and Install PanFone Manager to export music from your iPhone to Windows PC.
Download
Win Version
Download
Mac Version
Please click the button to download and install the PanFone Manager. And then run it on your computer.
Step 2: Connect iPhone to the computer and launch this iPhone Manager.
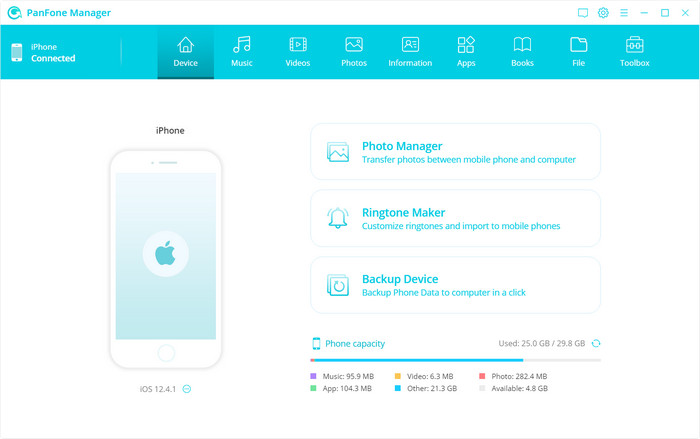
Connect the iPhone to the computer with the USB cable and let the application identify your device. Once the iPhone Manager successfully detects the iPhone, you can view its snapshot on the screen.
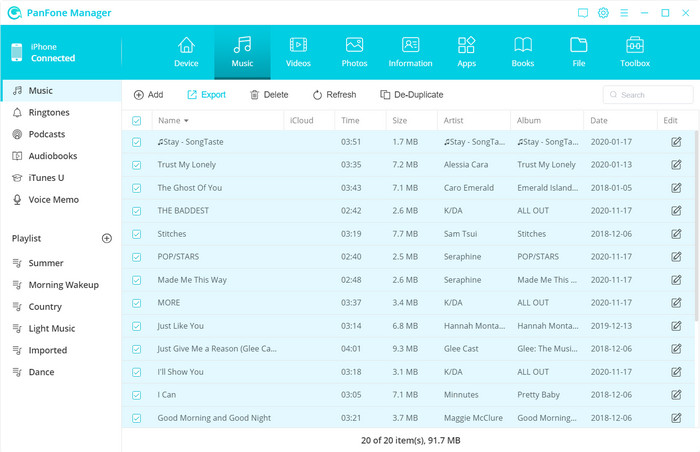
Step 3: Click on the "Music" tab from the navigation bar to switch to the Music panel. Then you can view all the music files on your new iPhone 12.
Step 4: To add the music from iPhone 12 to the pc, just select the music you want to transfer and then click on the "Export" button icon which is located on the toolbar. Then an explorer window will pop up. Choose a folder to store these music files.
Simply wait for a while, then this iPhone Manager will directly transfer the selected files from your computer to the iPhone.
Tips
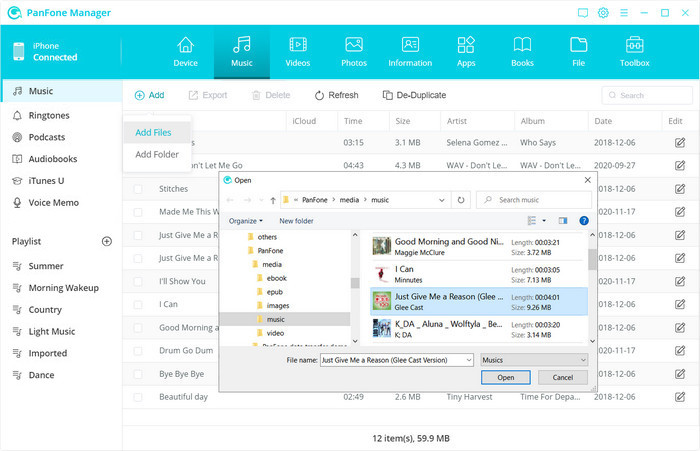
You also can transfer music from Windows PC to your iPhone 12 by clicking on the "Add" button icon which is located on the toolbar and select "Add Files". Then a browser window will pop up. Browse the storage location on your computer to select the music you want to transfer. Click "Open" to import music from computer to iPhone directly.
Conclusion:
The above are three methods to transfer music from iPhone 12 to Windows PC. Undoubtedly, the first one is the fast and convenient way to get all the audio files from your iPhone 12 to your Windows PC. You can just one-click to transfer the all music files and furthermore, one-click to restore them to any device from the computer as you want. Lets' download and just try this PanFone iPhone Data Transfer now!
Download
Win Version
Download
Mac Version