Quick Navigation
Once you have finished downloading PanFone from our site or other places, it's easy to finish installation following the instructions.
Step 1. Locate and launch the downloaded .exe file to start the installation wizard.
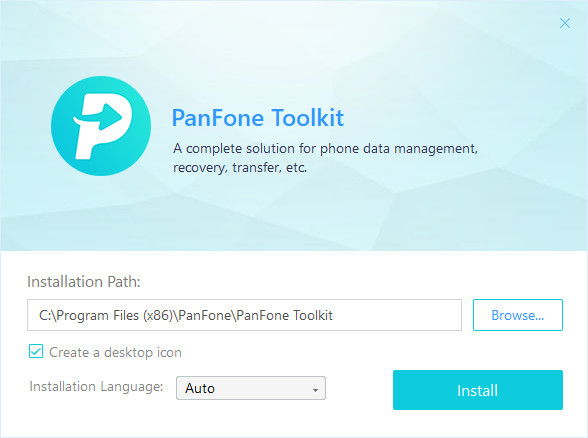
Step 2. Click on Customize Install, you are allowed to select installation path and language. Then click on Install button.
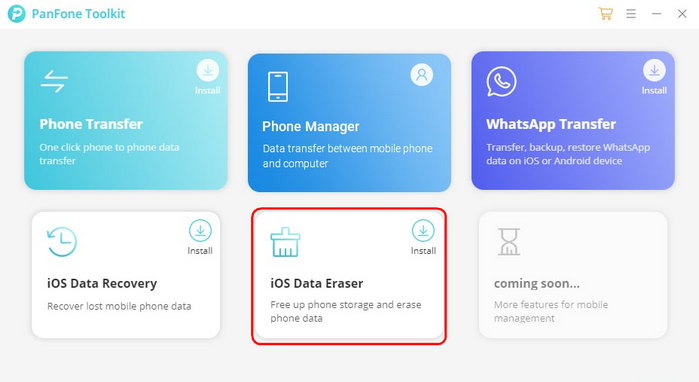
Step 3. After a while, PanFone Toolkit will be installed successfully. Click on "iOS Data Eraser" to launch the application.
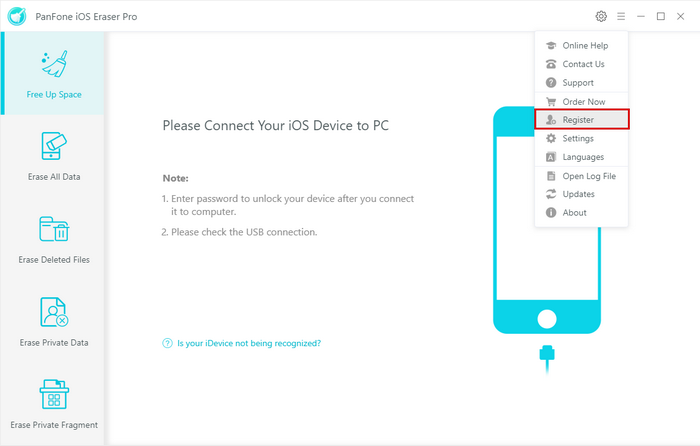
Step 1. Click menu button on the right corner of the program interface.
Step 2. Choose Register in the drop-down list when a prompt pops up.
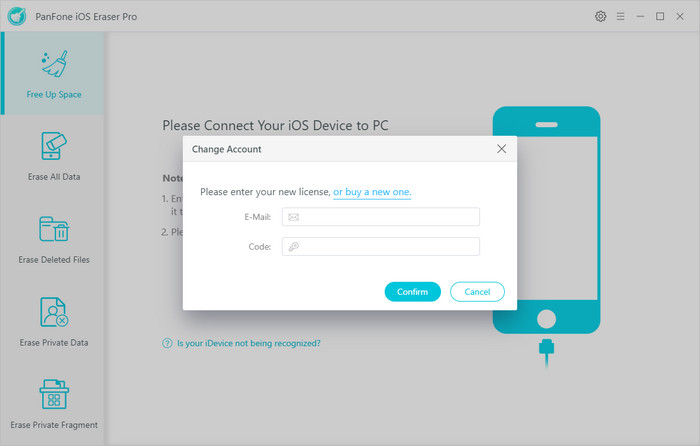
Step 3. Copy and paste the Email and Code into the registration popup dialog.
Note: The registration contents are case sensitive. Please do not add blank at the beginning or the end of the word. (000's are number "0"s, not letter "O"s)
Or to get more info about the detailed user guide of PanFone iOS Eraser, refer the User Guide.
System & Hardware Requirements
- Operating System: Window 11/10/8.1/8/7
- CPU: 1GHz (32 bit or 64 bit) or above
- RAM: 512 MB or above.
- Disk Space: 200 MB or more
Supported Devices OS
iOS: iOS 18, iOS 17, iOS 16, iOS 15, iOS 14, iOS 13, iOS 12, iOS 11, iOS 10, iOS 9
All Devices Supported by PanFone iOS Eraser
| iPhone | iPhone 16, iPhone 16 Plus, iPhone 16 Pro, iPhone 16 Pro Max, iPhone 15, iPhone 15 Plus, iPhone 15 Pro, iPhone 15 Pro Max, iPhone 14, iPhone 14 Max, iPhone 14 Pro, iPhone 14 Pro Max, iPhone 13, iPhone 13 mini, iPhone 13 Pro, iPhone 13 Pro Max, iPhone 12, iPhone 12 mini, iPhone 12 Pro, iPhone 12 Pro Max, iPhone 11, iPhone 11 Pro, iPhone 11 Pro Max, iPhone XR, iPhone XS Max, iPhone XS, iPhone X, iPhone 8 Plus, iPhone 8, iPhone 7 Plus, iPhone 7, iPhone SE, iPhone 6s Plus, iPhone 6s, iPhone 6 Plus, iPhone 6, iPhone 5S, iPhone 5C, iPhone 5, iPhone 4S | |||
| iPad | iPad, iPad 2, The New iPad, iPad mini, iPad with Retina display, iPad mini with Retidisplay, iPad Air, iPad Air 2, iPad mini 3, iPad mini 4, iPad Pro | |||
| iPod | iPod touch (5-7 generation ) | |||
1. Make sure your iOS is supported. PanFone can support iOS 7.0 and later.
2. Reconnect your device or use another workable USB cable (the originally USB cable is the best if available to use); then close and restart PanFone.
3. Ensure that the latest version of iTunes is installed successfully and it can detect the device. If not, you can go to the link to download and reinstall it.
4. Make sure you have the latest version of PanFone iOS Eraser.
5. If you are connecting the iOS device to the computer for the first time, please remember to tap Trust on the device when it prompts for authorization.
6. Still fails? Please follow detailed tutorial here.
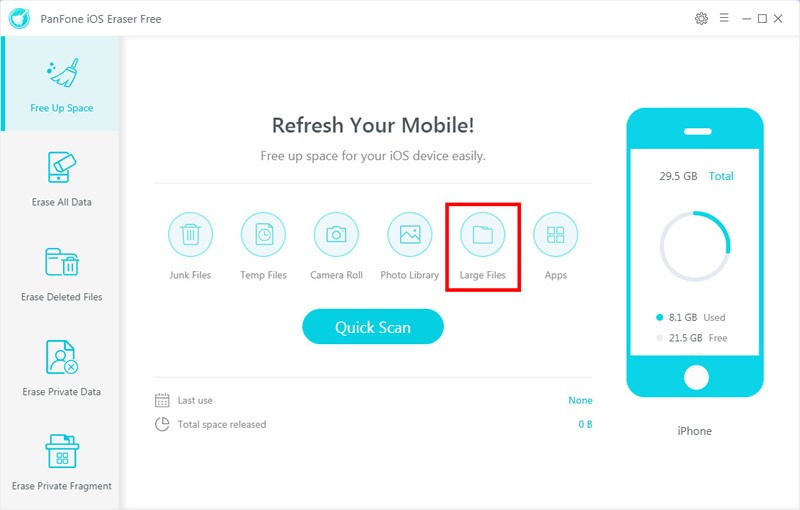
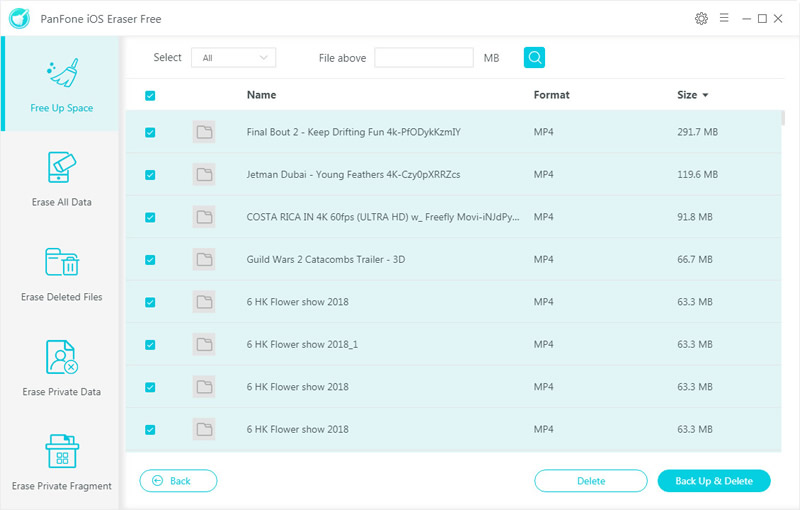
After deleting large files, go back to the Free Up Space interface of PanFone iOS Eraser Free, and click "Large Files" on list, you can find all your large files.
For iDevices with iOS 8.2 and below version, PanFone can remove temporary files created by both the iOS system itself and the third-party apps.
For iDevices with iOS 8.3 and above, PanFone can also remove temporary files created by iOS system itself. But for third-party apps' temporary files, we couldn't remove them directly, we free up this part of space by clearing up trash debris.
PanFone will apply the almost lossless compression technique – JPEG to compress the photos and reclaim more space on your iOS Devices. "JPEG" is the so-called Joint Photographic Expert Group – the first international standard of image compression. JPEG image compression algorithm does not merely provide good compression performance, but at the same time, has a better reconstruction quality, thus, it makes the lossless compression available. All in all, "JPEG" typically achieves 10:1 compression with little perceptible loss in image quality, which is widely and popularly used in image processing field.
In conclusion, by virtue of JPEG technique, PanFone can safely compress your photos to release up to 75% of your photos' capacity for your iDevice.
If you encounter an error for the first time, please restart the program and try again. If you encounter the error for several times, please submit your problem to our Support Email: [email protected]. Offer us your iOS model, iOS version and your PanFone log file. You can find all the logs file from Menu > Open Log File > Logs and send us all the logs in this folder. Please try to submit your case as much detailed and clear as possible to us.
PanFone will not ignore any question that submitted to us. We will try our best to solve all technical issues or other problems that you encounter when using our products. Sometimes, we may deal with many questions at one time, so please kindly wait for our reply. We promise that the earliest response will be provided to you!
You're allowed to cancel it any time you want before the renewal date. Two ways for you to cancel the subscription:
1. After you successfully purchase a subscription plan, you will receive a confirmation email with related registration information. Scroll down to find sentence "To cancel the auto-renewal subscription, click here", click on it to cancel the auto-renewal service.
2. If you can’t find the entry or just accidentally lost your confirmation email, contact our customer service team to cancel via: [email protected]
After the cancellation, you will not be charged starting from the next subscription period.
The prices displayed on our website are all excluding taxes, so the actual price depends on the pay VAT of your country.
Generally speaking, the renewal price is the same as the initial purchase price unless you purchased the license in a discount promotion. We do have occasional discount promotions and the discounted price is only applied to the initial purchase. Any of the subsequent renewal will be charged at original price as our website display.
