![]() Cross-platform transfer solution for all smartphone users to transfer content between Android and iOS, transfer data from iTunes, iCloud, iTunes library to mobile phone.
Cross-platform transfer solution for all smartphone users to transfer content between Android and iOS, transfer data from iTunes, iCloud, iTunes library to mobile phone.
The Best 4 Solutions to Restore Lost or Deleted Music to iPhone or iPad
When you play the music on your iPhone, iPad, or iPod touch but only to find that it is missing. Maybe it lost due to the iOS upgrade, device damage, formatting, or deleted accidentally.
So is there any way to backup the music library you have on device so that all of the songs can be added back to your iPhone or iPad after retrieving? Let’s look at the four solutions to restore your missing music files to your iPhone or iPad.
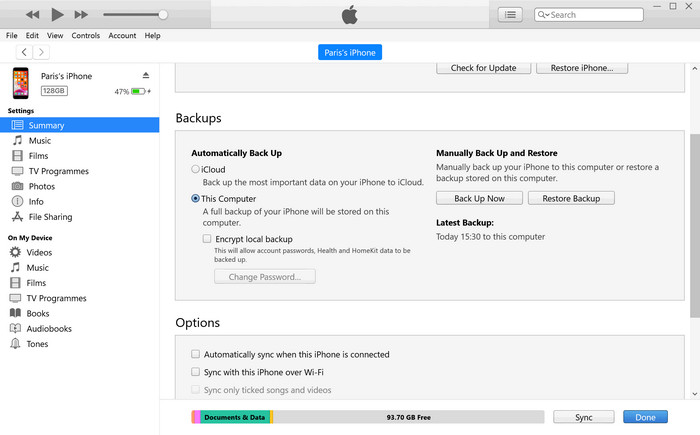
Solution 1: Restore Music on iPhone / iPad from iTunes Backup
Step 1: Connect your iPhone or iPad to your computer with a USB cable. If a message asks for your device passcode or to Trust This Computer, follow the onscreen steps.
In macOS 10.15 Catalina, open Finder and click the entry for your mobile device. On a Mac with macOS Mojave 10.14 or earlier, or a Windows PC, open iTunes. Select your iPhone, iPad, or iPod touch when it appears in the Finder window or iTunes.
Step 2: Choose "Restore backup" on iTunes and wait for a few minutes until the backup process to complete.
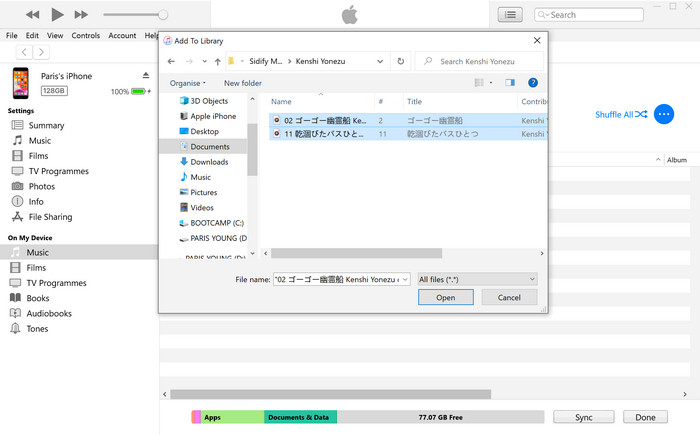
Solution 2: Manually Add Music from iTunes to iPhone or iPad
If you still can not restore music from iTunes backup on the computer, you can try manually add music from iTunes to your iPhone or iPad.
Step 1: Connect your iPhone or iPad to your computer with a USB cable.
Step 2: Open iTunes, then select your iPhone, iPad, when it appears in the Finder window or iTunes, and choose "Music" on the left side under Devices.
Step 3: Choose the music that you want to add to the iPhone or iPad from the iTunes library, then drag the selected music to the iPhone on the left side under Devices.
Tips: You can use a Free PanFone iOS Manager to backup and restore music from the computer to iPhone or iPad. PanFone is an easy-to-use yet powerful iOS & Android mobile manager, which is well-designed for users who want to manage iOS and Android device contents on PC. It supports accessing iPhone, iPad and iPod touch to export music, photos, contacts, messages, videos, apps, eBooks and more to PC for backup, and restore the backup from PC to iPhone or iPad.
![]() PanFone Manager Free
PanFone Manager Free
PanFone Manager Free and utility Android/iOS data management tool which enables you to freely manage, transfer, backup, restore and delete mobile photo data on computer.
- Transfer music, photos, videos, contacts, messages and more between computer and mobile phone.
- Backup all important phone data on PC avoiding loss of data.
- Restore the backup files to your mobile phone with one click.
Download PanFone Manager Free:
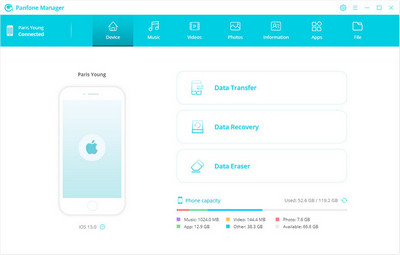
Step 1: Download and install PanFone Manager Free
Install PanFone Manager Free on your Windows PC.
Step 2: Connect the device with PC
Use a USB cable to connect your iPhone or iPad with a PC. During the connection, iOS users need to tap "Trust" to enable the connection. Open PanFone Manager and the program will detect your device and install the necessary components.
Step 3: Import music files from computer
Go to the Music section at the top of the main screen, then click on the "Add" button. There will be a window popping up, select the music files or folder you want to transfer to your iPhone or iPad.
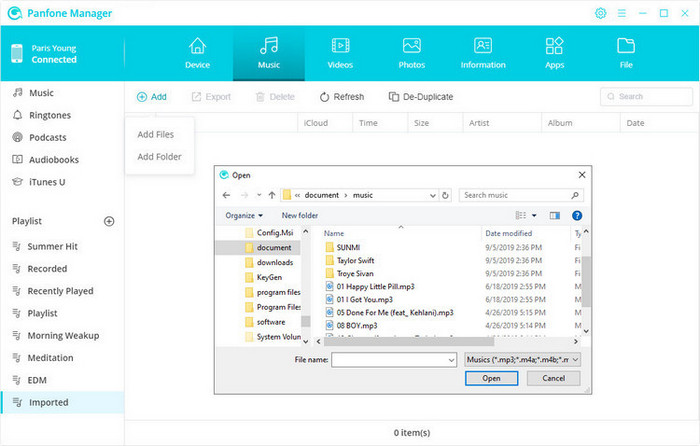
PanFone Manager will transfer the files to your devices quickly. After the transferring process complete, you can open the Music app on your iPhone, and tap "Downloaded Music" to find the music files you restore from PC.

Solution 3:Restore Music to iPhone or iPad from iCloud Backup
If you are iCould user who keeps some of your music files on the iOS device and has already backup them in iCloud, you can retrieve music to your iPhone or iPad with iCloud. The music you purchase through iTunes can be easily downloaded to your devices, so you can restore the music files to iPhone or iPad directly.
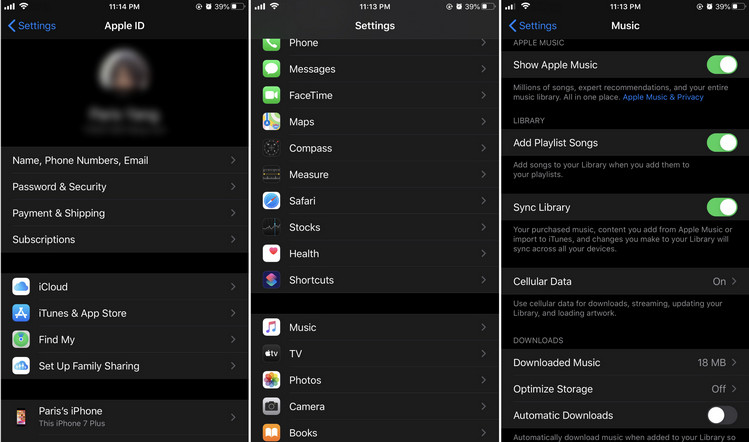
Step 1: Set up iCloud service on your iPhone by tapping Setting -> iCloud, and then sign in with your Apple ID and password.
Step 2: Return to the homepage and swipe download to Music, then tap Sync Library to recover the purchased music, content you add from Apple Music or import to iTunes, and changes you make to your Library will sync across all your iOS devices.
Solution 4: Restore Music to iPhone or iPad with Data Transfer
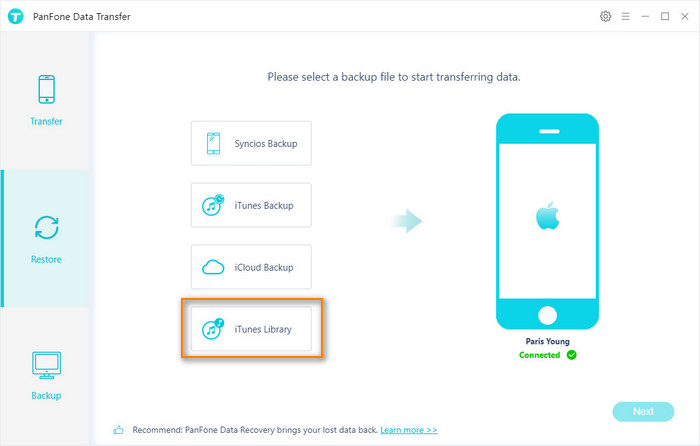
For non-purchased iTunes music, you can use PanFone Data Transfer to sync iTunes library to iPhone in one click. Here is a tutorial on how to sync iTunes library to iPhone 11 with PanFone Data Transfer.
Startup PanFone Data Transfer on your computer and connect your iPhone or iPad to the computer via USB cable. Then select "Restore" mode on the main interface. Under the restore page, simply select "iTunes Library" and click on the "Next" button to start restoring non-purchased music from the iTunes library to your iPhone or iPad.
Solution 5: Recover More Data to iPhone with Professional Recovery Tool
Due to the logical or physical failure of your device, you lost the important data and want to retrieve the data, in this circumstance, Data Recovery is very helpful in many ways. PanFone Data Recovery is a reliable application that allows you to quickly restore lost data from iOS devices, iTunes, and iCloud backup without overwriting. It can recover data that was accidentally deleted or corrupted due to device damage, formatting, iOS upgrade, and other situations.
PanFone Data Recovery offers you three methods of restoring data that you have lost: connect the iOS devices to the computer and scan it for file signature; extract files from an iTunes backup and iCloud. The program allows you to recover data from damaged devices and save it to your computer. Ir recovers up to 12 kinds of data, including photos, messages, contacts, reminders, calendars, bookmarks, videos, notes, call history, App data like WhatsApp conversations, iPhoto, Instagram, etc. This iOS data recovery software also provides a feature that allows you to selectively browse, preview, and retrieve data after the scan.
Key Features of PanFone iOS Data Recovery
PanFone iOS Data Recovery is a comprehensive iOS data recovery tool, provides 3 recovery modes to retrieve data from your iDevice, iTunes backup and iCloud backup:
- 3 Recovery modes - Recover from iOS Device, iTunes Backup and iCloud Backup without overwrite.
- Recover various deleted contents, including photos, messages, contacts, as well as App data like WhatsApp conversations, iPhoto, Instagram etc.
- A detailed preview before performing recovery.
- You can choose to extract found data to computer or put them back to device.
Now, let’s learn how to use PanFone Data Recovery and recover data for iPhone, iPad, iPod touch with three modes.
Mode 1: Recover the deleted data from iOS devices
This mode allows you to scan your iOS devices to recover lost data or deleted data, including contacts, text messages, iMessages, call history, notes, calendars, reminders and safari bookmarks from the latest iPhone, iPad, and iPod touch.
Step 1: Connect iPhone or iPad to PC and launch iOS Data Recovery
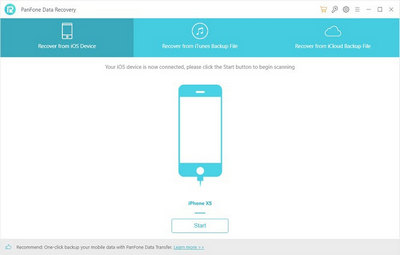
Launch PanFone iOS Data Recovery, you will see the homepage providing three recovery modes, click the Recover from iOS Device mode, and there will be prompt asking you to connect your device to PC. Connect your iPhone, iPad, or iPod touch to PC with a USB cable. Once PanFone successfully detects your device, you will see the interface as below.

Step 2: Scan your connected device
Click on the Start button below the device name, the program will begin to analyze and scan the connected device.
If your device is running iOS 7 or above and protected with a password, please unlock your device first, and tap Trust on the prompt on your device to authorize this computer.
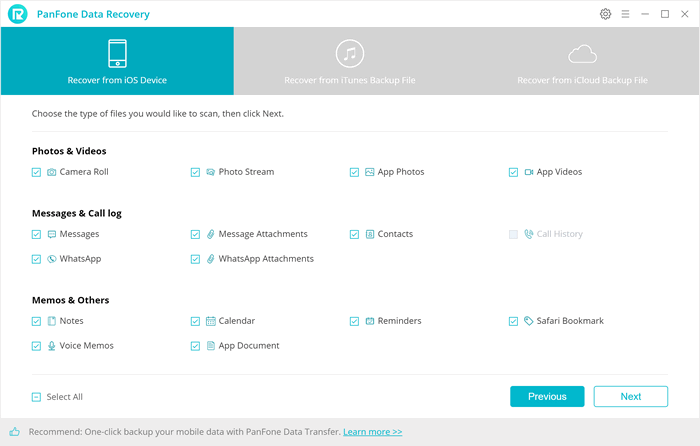
Step 3: Preview and select the lost data to recover
Once the program completes the scan and analysis, the scanned data is organized into three types: Photos & Videos, Message & Call log, and Memos & Others. You can select the specific or all data and click on the Next button to start recovering the lost data from iOS devices.
Mode 2: Retrieve lost iPhone, iPad or iPod touch data from iTunes backup
If you have an iPhone, iPad, or iPod touch, you can use this solution to extract and access the iTunes backup of your iOS device on your computer. And you do not need to connect your device with the computer when using this recovery mode
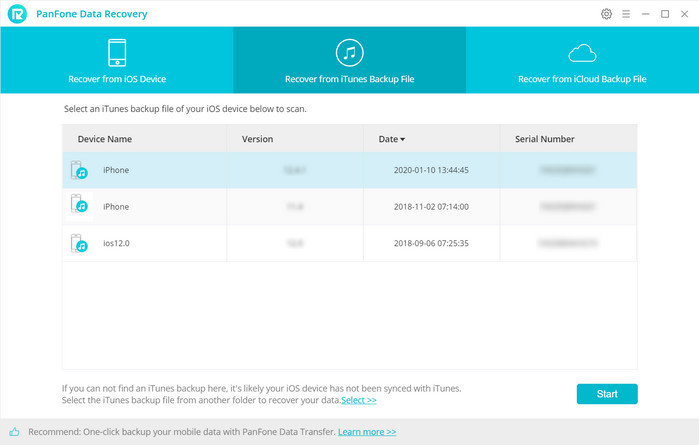
Step 1: Select your iTunes backup and extract it
Backup File mode. You will see the program displays all the iTunes backup files for your iPhone, iPad, iPod touch on the list. Choose the one you would like access to and click on the Start button to enter into the next step.
Step 2: Preview and select the data to recover
You can choose the type of files you like to scan and click on the Next button. The program starts scanning your iTunes backup. When the scan over, you will find all the backup files are listed and displayed in categories. Click the file types and you can preview the files in thumbnails on the tight of the program interface.
Select the data you want to recover, and click on Recover to Computer or Recover to Device to start recovering Contacts, Notes, Camera Roll, Photostream, SMS, Call history, WhatsApp, Bookmarks, and Voice memo to the device.
Mode 3. Recover data from iPhone, iPad & iPod touch with the iCloud backup
PanFone iOS Data Recovery also lets you download and extract your iCloud backup content if you are the users who backup files to iCloud, this program is also your best option.
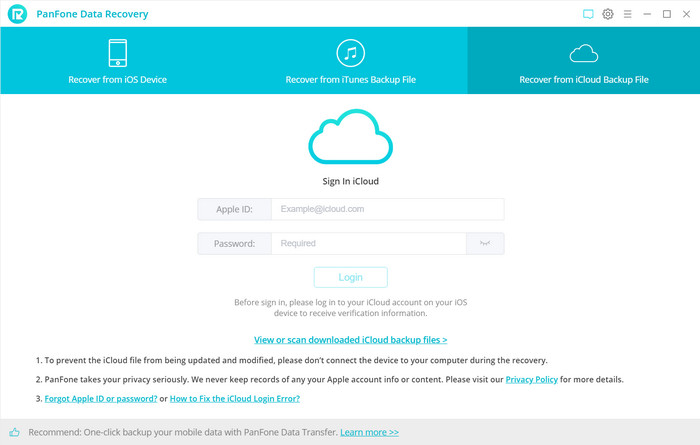
Step 1: Log in iCloud
Run PanFone Data Recovery and select Recover from iCloud Backup File mode. Then enter your Apple ID and password to sign in.
Step 2: Download latest iCloud backup files
The program then loads all iCloud backup files, and you can choose the one you want to access and choose a backup to download. Then click on the Next button and select the ones you need.
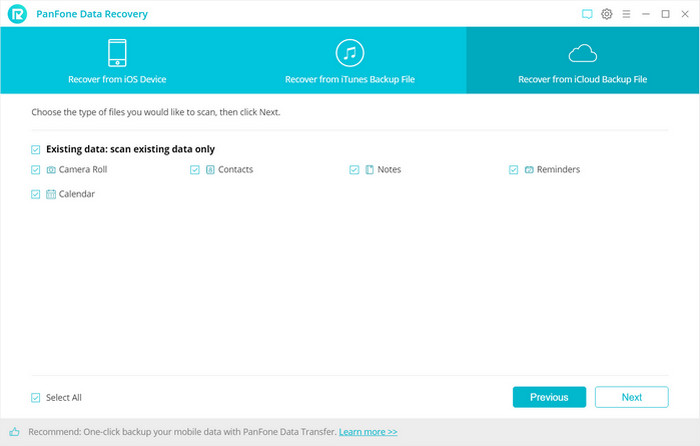
Step 3: Extract the downloaded iCloud backup to access the content
Once the downloading is completed successfully, you can begin scanning to extract it so that you can access the details. Click on the Next button and the program extracts the backup file quickly.
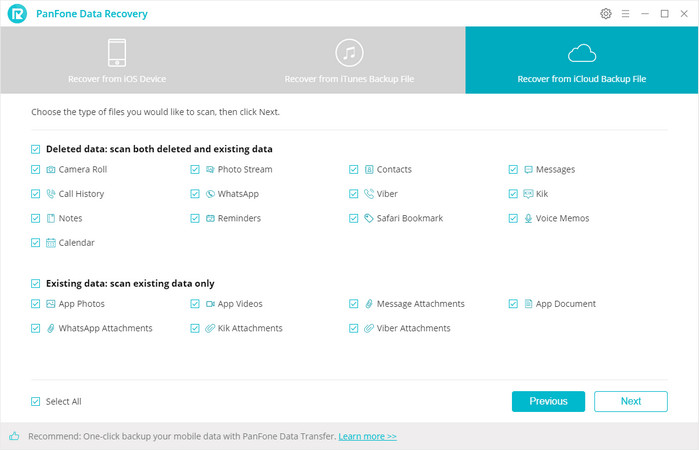
Step 4: Preview to ensure what you want to recover
Check the content thumbnails in your iCloud backup file and choose the data you want to retrieve by clicking Recover to Computer or Recover to Device.
You can restore music from iTunes, iCloud backup to iPhone, or manually add the music files from iTunes, or use the third-party tool to help you sync the music to iPhone more effectively. You can choose the appropriate one from the four solutions we mentioned above, or you can share another useful way for us!
Download
Win Version Download
Mac Version