![]() Cross-platform transfer solution for all smartphone users to transfer content between Android and iOS, transfer data from iTunes, iCloud, iTunes library to mobile phone.
Cross-platform transfer solution for all smartphone users to transfer content between Android and iOS, transfer data from iTunes, iCloud, iTunes library to mobile phone.
How to Delete Everything and Wipe All Personal Data on iOS 13
When we're upgrading to a new iPhone or iPad, leave no data behind you. Whether we want to re-install our iPhone, iPod touch, or iPad as new or we want to sell or give it away to someone else entirely, we first need to make sure we've wiped it clean and erased all of our data, including our photos, messages, and other files. It only takes a few steps, and a few minutes, and it makes sure our data is protected.
Back up our iPhone or iPad before wiping it
Before we do the deletion, please make sure we have had an up-to-date backup of iPhone or iPad. Although there might be a backup automatically created, but a manual backup will make sure we're absolutely up to date. We use PanFone Data Transfer to make backup selectively.
Step 1 : Connect your iOS device to the computer
Connect your iPhone, iPad, or iPod touch to your computer. In order to backup your device, it needs to be powered on and unlocked before you backup.
Step 2 : Download and install PanFone Data Transfer
Instead of iTunes, PanFone Data Transfer can help us to backup file as we did before.
Choose a proper version and download it by clicking following button.
Download
Win Version
Download
Mac Version
Step 3 : Backup files from iPhone or iPad to computer
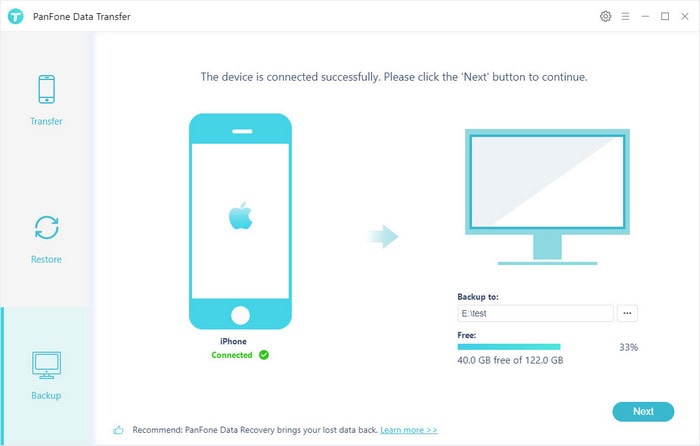
Launch PanFone Data Transfer. It will recognize the connected iOS device automatically. Please agree to trust the computer from your device. You can’t backup your iPhone, iPad, or iPod touch to computer if you don’t trust that computer.
Then in the PanFone, tap "Backup" on the left panel. Then set the path to store the backup file. Click "Next".
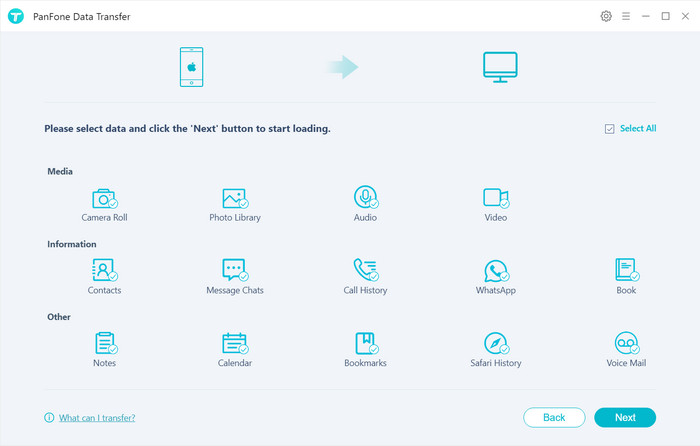
This panel show all types of data on your iOS Device. You can choose the data you want to backup.
Waiting for a while, your selected data would be backed up to computer successfully without loss. And you can browse the backup files as you like.
Then we will do erasing on the iOS device.
How to Delete Everything on iOS 13 Permanently
Different with formatting or restoring to factory setting, this method will delete everything on the iPhone or iPad and no way to find the data back. It is impossible for someone to steal your iPhone data with the help of certain data recovery software. The recommended eraser tool is PanFone iOS Data Eraser, which can permanently erase the data 100% unrecoverable.
Step 1 : Download and install PanFone iOS Data Eraser to your computer.
Download
Win Version
Buy Now
Win Version
Step 2 : Launch PanFone iOS Data Eraser and connect the iOS device to your computer.
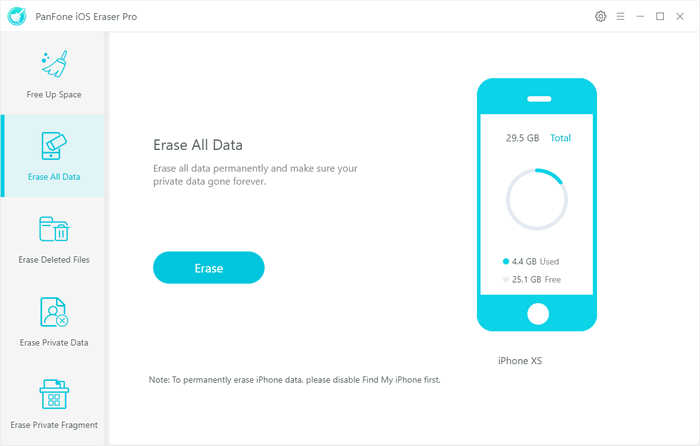
Note: you need to turn off Find My iPhone first if you want to permanently wipe your iPhone data.

Step 3 : Select Erase All Data mode on the main interface and tap Erase button.
Step 4 : There are 3 security level to select. Choose one you prefer and click OK. The default recommended level is Medium.
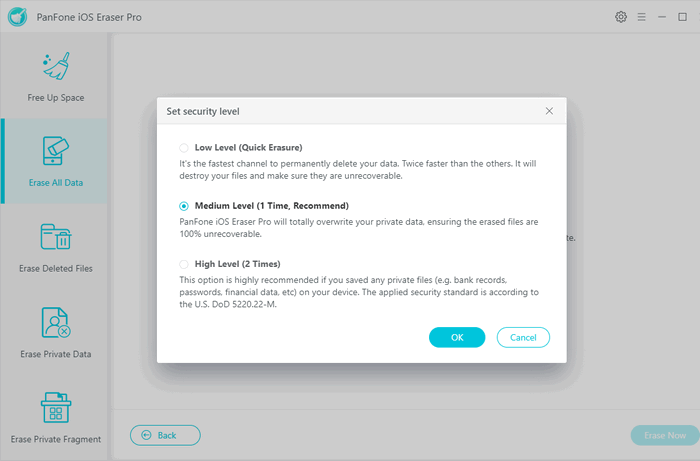
- Low Level: Just remove data. Replace them with modified data and delete these data again. All data are destroyed and unrecoverable. This level of erasing is the fastest.
- Medium Level: Remove the existing data and overwrite them with random data and then delete them again. Leave no trace of erasing after the deletion to make sure the deleted data 100% unrecoverable.
- High Level: The longest and most secure data destruction option to write over the data three times, the security standard of which is based on the U.S. DoD 5220.22-M. It's highly recommended if you have stored any important private data on your iPhone/iPad, such as bank records, passwords, etc. Generally, we recommend user to use the Medium Level, which is enough to make sure of personal information safety.
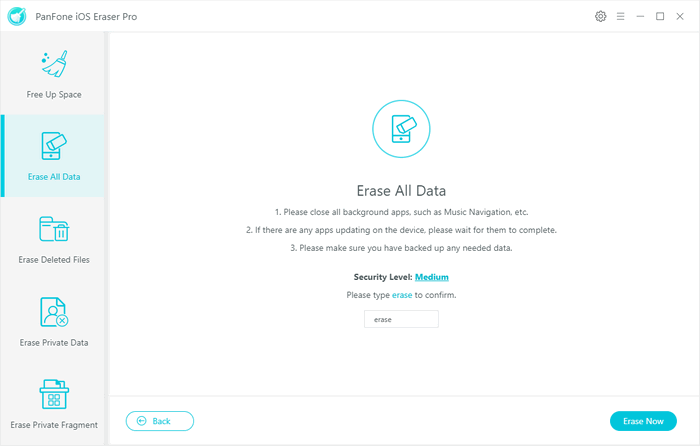
Step 5 : In the pop-up window, manually type erase in the required box to confirm the action, and then click Erase Now.
Step 6 : The erase begins. And when it finishes, you will get the successful window.
All the personal data and important documents are securely and permanently deleted from the iOS device.
Note: please note this action will PERMANENTLY erase all data and CANNOT be undone.
The above is introducing the safe and reliable method for wiping away the very important data and privacy on iOS 13. Besides erase the complete data on iOS 13, PanFone iOS Data Eraser supports you to selectively choose what files to erase. It also supports clear caches or temp files to make iPhone or iPad "clean". Just download it to have a try.
Features of PanFone iOS Data Eraser
PanFone iOS Data Eraser Pro helps you to erase data from iOS device to protect your privacy.
- Erase data on iOS device completely with nothing recoverable.
- Wipe 10+ social apps data: WhatsApp, LINE, WeChat, Kik etc.
- 100% secure private data when switching phones.
- Erase deleted files and private fragments with no chance to recover.
- Clear junk files and speed up iPhone/iPad.
- Support for all iOS device running iOS 7 and above (including iPhone XS).
