![]() Cross-platform transfer solution for all smartphone users to transfer content between Android and iOS, transfer data from iTunes, iCloud, iTunes library to mobile phone.
Cross-platform transfer solution for all smartphone users to transfer content between Android and iOS, transfer data from iTunes, iCloud, iTunes library to mobile phone.
Restore iTunes/iCloud Backup to Samsung Galaxy S20/S20+
"I once used Apple iPhone, so I often back up to iTunes. Now I want to change to Samsung Galaxy S20. But I find no way to transfer backup from iTunes to my Samsung S20. Any smart solutions?"
The Galaxy S20, S20+ and S20 Ultra 5G are that phone which will change photography. They have revolutionary 8K Video Snap, 5G connectivity and Space Zoom up to 100x so the way we capture and share our life will never be the same. If you just switch from iPhone to Samsung S20 series, you may be eager to know how to restore the backup from iTunes/iCloud to your Samsung Galaxy S20. This quick guide just tells you how to restore the data from iTunes/iCloud to Samsung S20/S20+/S20 Ultra so that you can find back your data that have been on your iOS device.
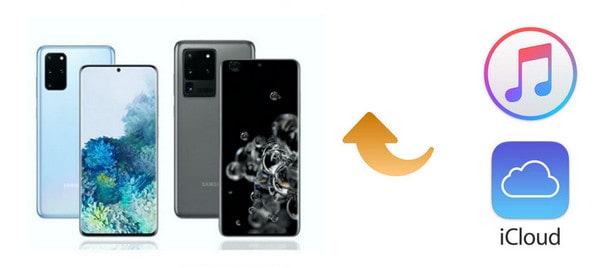
In the new beginning of 2020, Samsung released its Galaxy S series: Samsung Galaxy S20, Galaxy S20, and Galaxy S20 Ultra. The three phones use a new design language and a variety of colors and are excellent in size, configuration and camera. Compared with iOS iPhone/iPad, the Android OS Smartphones/Tablets are cheaper. The S20 might be a better choice to replace the iPhone. When you switched from iPhone to Samsung Galaxy S20, getting photos or contacts from iTunes backup on your Samsung phone might be a problem. But now we can use PanFone Data Transfer to transfer data from iTunes and iCloud backup to Samsung S20.
Features of PanFone Mobile Data Transfer
PanFone Mobile Data Transfer is a one-click solution for you to transfer multiple contents between iOS & Android, restore iTunes and iCloud data to device conveniently, as well as back up your phone data and restore later.
- Transfer files between Android and iOS, including contacts, photos, music, SMS, and more.
- Backup phone data and restore in lossless quality.
- Recover iTunes/iCloud backup to iOS or Android devices.
- Sync media files from iTunes Library to devices.
- Compatible with Android 11 and the latest iOS.
Click the button to download and install the proper version of the PanFone Data Transfer on your computer. Follow these methods to download the file from iTunes/iCloud to Samsung S20/S20+/S20 Ultra.
Restore Files from iTunes Backup to Samsung Galaxy S20/S20+/S20 Ultra
Step 1: Open the PanFone Data Transfer program and connect Samsung Galaxy S20 to the computer. Still in the "Restore" panel of PanFone Data Transfer. Choose "iTunes Backup".
Step 2: If you've backed up an iOS device on your computer via iTunes, PanFone Data Transfer could locate your iTunes backup automatically. After loading, select an iTunes backup then return to the "Restore" interface. Click on the "Next" button.
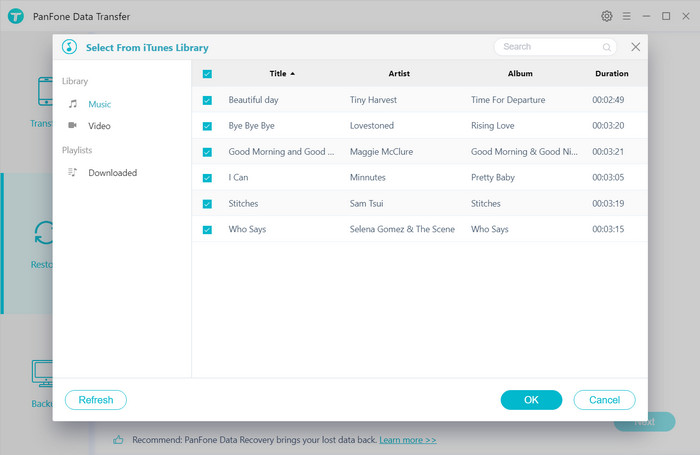
Step 3: Check the contents you need. Then click on the "Next" button and wait for data loading. After loading, hit the "Next" button again to start transferring iTunes backup files to your Samsung Galaxy S20.
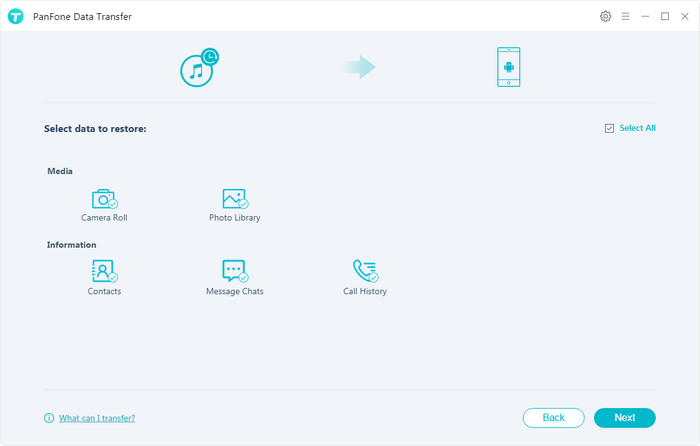
Transfer Files from iCloud Backup to Samsung Galaxy S20/S20+/S20 Ultra
Step 1: Open the PanFone Data Transfer program and connect Samsung Galaxy S20 to the computer. In the "Restore" panel of PanFone Data Transfer, choose "iCloud Backup".
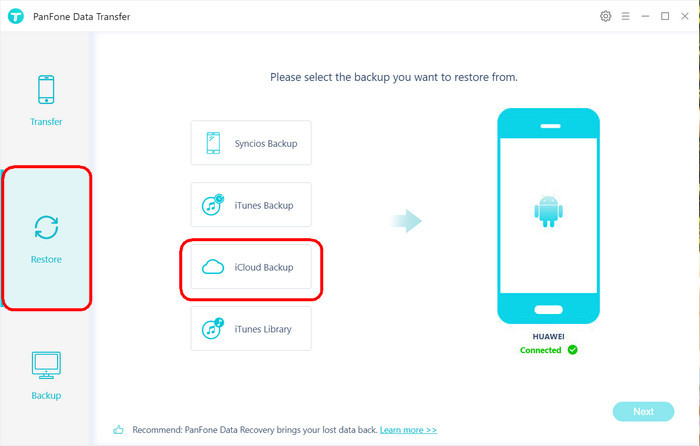
Step 2: You will be required to log in with your iCloud account. Please note that no private information will be recorded by PanFone.
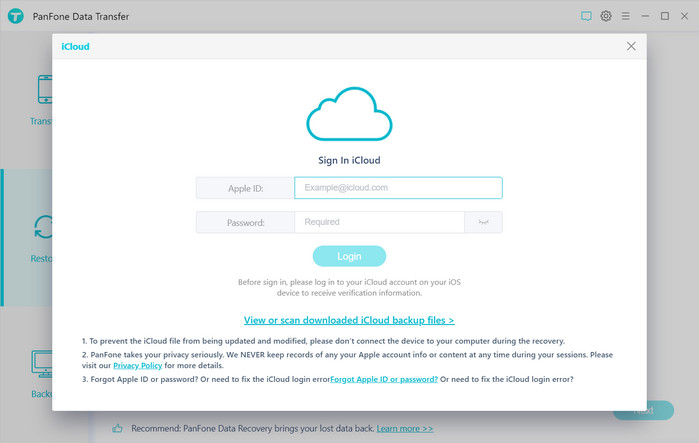
When you sign in, the backups associated with your account will be listed. Choose one and click Download. And the backup file will be saved to a local directory on your PC.
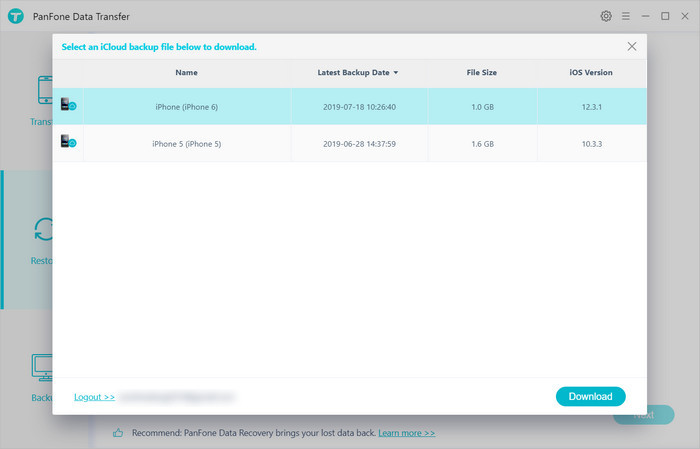
After that, return to the primary "Restore" interface. Click on the Next button on the interface.
Step 3: Then choose the contents from the iCloud backup file that you want. Tap the "Next" button to load the selected data and next to initiate the transfer.
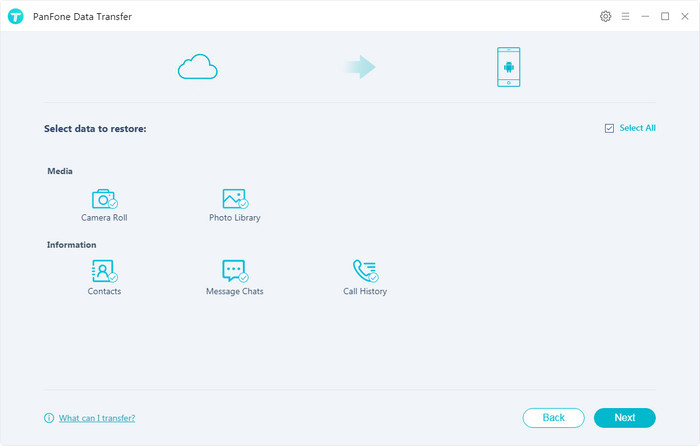
Note: Please enable the debugging mode of your Samsung phone before the transferring.
Conclusion:
These are two detailed guides about how to transfer backed up files from iTunes and iCloud to Samsung Galaxy S20/S20+/S20 Ultra. With PanFone Data Transfer, you can directly transfer the iTunes/iCloud backup data to Samsung S20. And furthermore, PanFone Data Transfer also supports transfer data from phone to phone directly. Free to try it!
Download
Win Version
Download
Mac Version