![]() Cross-platform transfer solution for all smartphone users to transfer content between Android and iOS, transfer data from iTunes, iCloud, iTunes library to mobile phone.
Cross-platform transfer solution for all smartphone users to transfer content between Android and iOS, transfer data from iTunes, iCloud, iTunes library to mobile phone.
![]() > How-To > How To Transfer Photos from iPhone to PC
> How-To > How To Transfer Photos from iPhone to PC
How To Transfer Photos from iPhone to PC
People enjoy taking photos with their iPhone, but it won't be pleasant if your iPhone has run out of the storage. Wanna know how to transfer photos from iPhone to PC and delete them from iPhone to free up space? Luckily, there are several quick ways to transfer photos from iPhone to computer. In this article, you’ll learn how to copy photos from iPhone to your PC/Window 7/8.1/8/10 in minutes!
 Way 1. One-click to Transfer All Photos from iPhone to PC
You know, you can get many ways to transfer iPhone photos to computer, but most of them only help you transfer Camera Roll Photos to computer, and all photos are placed in disorder, etc. Therefore, here we recommend you an iPhone content transfer tool – PanFone iOS Data Transfer, which does great transferring iPhone photos to PC in Windows 10/8.1/8/7 in an one-click. Apart from photos, it can help you to backup and export contacts, SMS messages, Notes, Ebooks, call logs, music, videos, etc from iPhone to computer. Plus, you are able to restore the data from computer to iPhone whenever you want.
![]() PanFone Data Transfer
PanFone Data Transfer
PanFone Data Transfer is a one-click solution for you to transfer multiple contents between iOS & Android, restore iTunes and iCloud data to device conveniently, as well as back up your phone data and restore later.
- Transfer files between Android and iOS, including contacts, photos, music, SMS, and more.
- Backup phone data and restore in lossless quality.
- Recover iTunes/iCloud backup to iOS or Android devices.
- Sync media files from iTunes Library to devices.
Download PanFone Data Transfer:
Simple Steps to Copy Photos from iPhone to PC
Step 1 : Download and install PanFone Data Transfer on your computer.
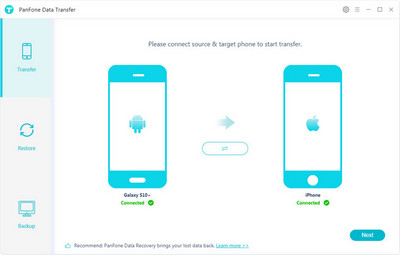
Step 2 : Run this program and get your iPhone connected to computer.
Connect your iPhone to computer with an USB cable, PanFone would detect your iPhone automatically.
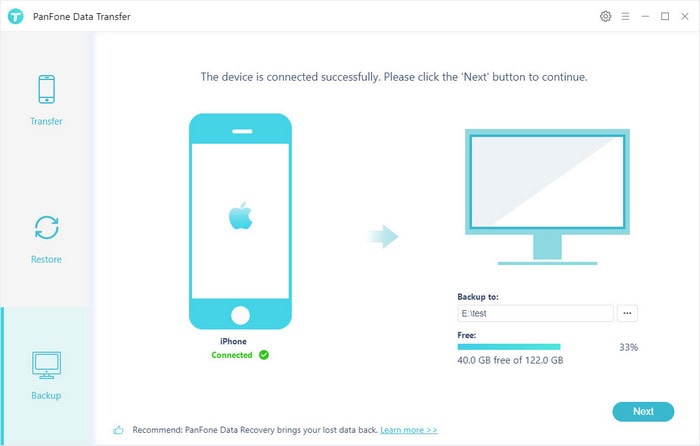
Step 3 : Select Backup Option to bring up the one-click backup Panel.
Once your iPhone is connected successfully, simply select Backup option and then click on Next button to go ahead.
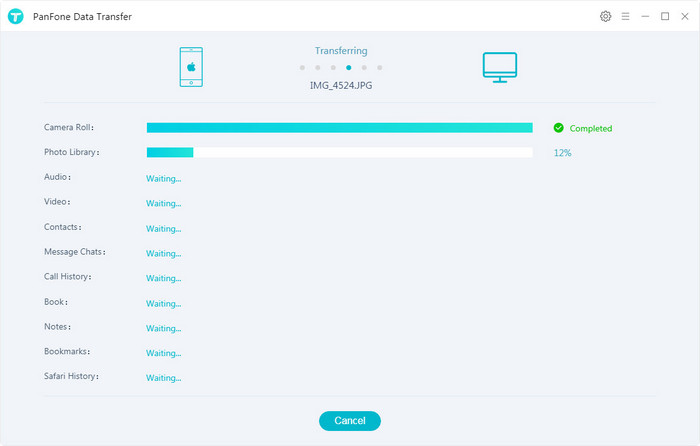
Step 4 : Tick off "Camera Roll" and "Photo Library" on the checkbox, then click on "Next".

After a while, your photos will be transferred from iPhone to the computer.
Video Tutorial - Transfer Photos from iPhone to PC
Way 2. Import Photos from iPhone to PC Windows 7 with AutoPlay
If you are a Window 7 user, the AutoPlay in Window 7 will help you transfer Photos on iPhone to PC.
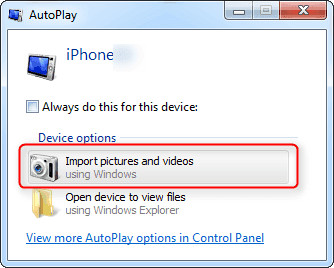
Step 1 : Connect you iPhone to your PC. When the AutoPlay window pops out, Choose "Import pictures and videos".
Step 2 : In "Import Settings", choose or create a folder to store the photos from you iPhone.
Step 3 : Confirm your setup and click "Import" to begin the photo transfer.
Note: Open iTunes Preferences and select the Devices tab. If the backup is successful, you will see it listed there. This method is used to verify that the backup is valid.
Way 3. Backup iPhone Photos to PC Windows 8 with AutoPlay
If you are a Window 8 user, you can also use AutoPlay to transfer iPhone photos to computer.

Step 1 : Connect you iPhone using the cable with your Windows 8 PC. Wait for your PC to detect your iPhone. You might see a notification with Trust option. Tap on Trust option to continue.
Step 2 : Open "The PC" and right-click on the iPhone device and then select "Import pictures and videos".
Step 3 : Select "Review, organize, and group items to import" option if you are transfer or importing images first time. Or click "Import all new items now" if you have already transferred photos from your iPhone. Click Next.
Step 4 : Click on "More Option" link to choose folders where you want import iPhone pictures and videos. Set folder for Pictures. click OK and then Next button.
Step 5 : Select the groups of photos you want to import, click the Import button.
Way 4. Move Photos from an iPhone to PC Windows 10 with Windows Photos
Just like Windows 7, Windows 8, the Photos App on Windows 10 also only supports transferring the Camera Roll photos from iPhone to PC. If you plan to transfer all the photos from your iPhone to computer, you can move to Way 1 to make it.

Step 1 : Go to the Windows Photos app that comes with Windows 10.
Step 2 : Click "Import" in the top right-hand corner.
Step 3 : Your photos should be ready for import.
Step 4 : Select or deselect pics, depending on what you want to import.
Step 5 : Click Continue and follow the instructions.
Way 5. Download All iPhone Pictures to PC from iCloud Photo Library
Do you want to know how to transfer pictures from iPhone to computer via iCloud Photos? You just need to follow the steps below:
Step 1 : Download iCloud for Windows. Follow the promoted instructions to get iCloud installed.
Step 2 : Open iCloud for Windows and sign in to iCloud with your Apple ID.
Step 3 : Click "Options" on the right of "Photos".
Step 4 : Switch iCloud photos options on and click "Done". Apply this change on iCloud.
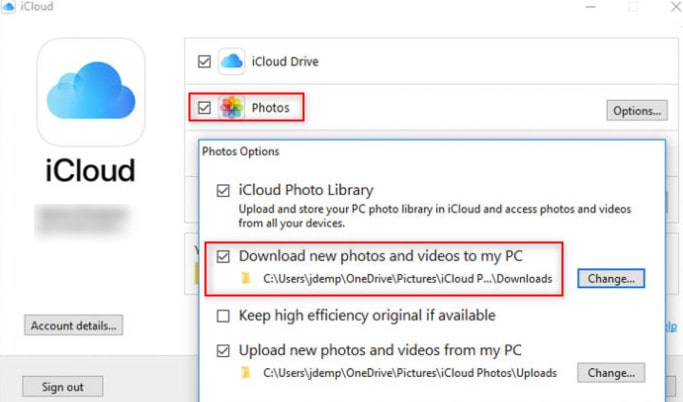
Step 5 : Turn on iCloud Photo Library on your iPhone (Settings > Photos & Camera). Photos will be uploaded to iCloud Library on computer when connected to Wi-Fi.
Step 6 : Launch iCloud Photos on a computer or laptop again. Click "Download" and your photos will be stored to the location you set in iCloud Photos Options.

After you read this guide, you now know the easy method to transfer photos from iPhone to PC. Hope this article is useful to you. Any other questions, please fell free to leave us a comment below.
Download
Win Version
Download
Mac Version