![]() Cross-platform transfer solution for all smartphone users to transfer content between Android and iOS, transfer data from iTunes, iCloud, iTunes library to mobile phone.
Cross-platform transfer solution for all smartphone users to transfer content between Android and iOS, transfer data from iTunes, iCloud, iTunes library to mobile phone.
![]() > How-To > How to Transfer WhatsApp Photos from iPhone 12 to PC/Mac
> How-To > How to Transfer WhatsApp Photos from iPhone 12 to PC/Mac
How to Transfer WhatsApp Photos from iPhone 12 to PC/Mac
When we use WhatsApp, more of us would like to share photos with each other. The WhatsApp photos may be a collection of wonderful memories or important notes to you. In case your phone dies or lost, you will end up losing all these photos unless you have backed them up to your computer. And on the other side, you can get a better viewing experience by transferring WhatsApp images on your phone to your computer and clear space from your iPhone 12. In this article, we will be showing you how to transfer WhatsApp Photos from iPhone 12 to PC.
Method 1: Apply a WhatsApp Tool to Transfer WhatsApp Photos From iPhone to Computer
Since other methods are so complex and have restrictions, we will to show this easiest and convenient one at first. Using a professional tool to assist us in transferring WhatsApp photos to the computer is the efficient way, time-saving and no failure. The tool we used in this article is PanFone WhatsApp Transfer. It supports transferring all WhatsApp data from any devices, no matter iOS or Android, to the PC or Mac. It also helps you to back up iPhone/iPad/Android WhatsApp data to the computer and supports to export the chat in a readable HTML and CSV formats. PanFone WhatsApp Transfer can:
- Transfer WhatsApp data between Android and iOS devices.
- Back up WhatsApp chats, photos, videos, attachments, and more on iPhone/iPad/Android to the computer.
- Restore WhatsApp backups to iOS/Android devices.
- Export WhatsApp backups to the computer in HTML and CSV formats.
- Preview the backup content and restore only the data you want.
- Compatible with the latest iOS 14 and Android 11.
Steps to back up and restore WhatsApp data on iPhone 12:
Step 1 : Firstly, download and install PanFone WhatsApp Transfer on your computer.
Download
Win Version
Download
Mac Version
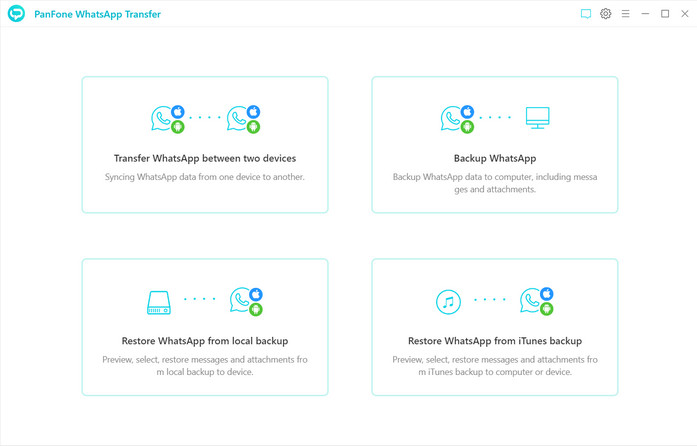
Step 2: Run PanFone WhatsApp Transfer on your computer. From its main interface, you can see four modules: Backup WhatsApp, Restore WhatsApp from local backup, Restore WhatsApp from iTunes backup and Transfer WhatsApp between two devices. Click the "Settings" button at the up-right corner to define the backup folder.
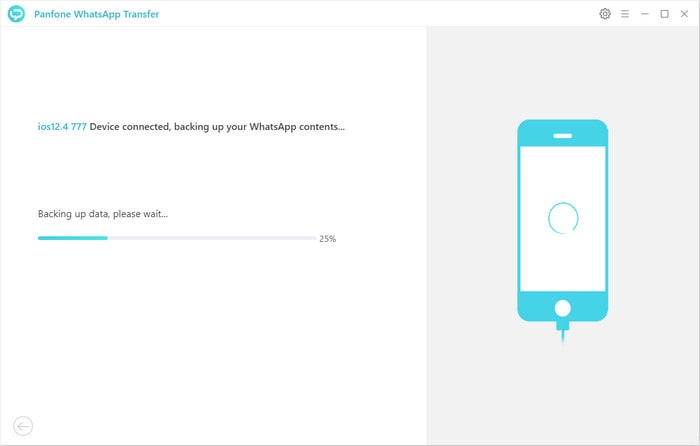
Step 3: Connect the iPhone 12 to the computer via a USB cable and then choose the Backup WhatsApp option. Click on the Start button. Your WhatsApp data (including messages, photos, video and attachments) would be transferred to computer. Please wait patiently. Keep your Android/iPhone connected and phone screen unlocked during the process.
Step 4 : Once the backup process is completed, the backup screen will display 'Backup Complete'. You’re able to check the backup contents by opening the backup folder on your computer.
Method 2: Transfer WhatsApp Photos from iPhone to PC or Mac Using USB Cable
By default, WhatsApp automatically saves all photos to the Camera Roll on your iPhone. In case, your iPhone is using this default setting, you can easily transfer WhatsApp Photos from iPhone to PC by plugging your iPhone into your PC or Mac using a USB cable.
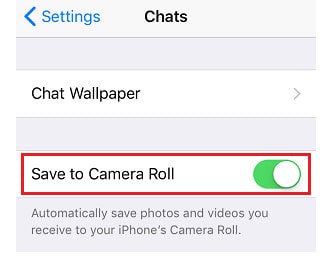
But this method can be used in case you have NOT disabled WhatsApp from Saving Photos to the Camera Roll on your iPhone. So please open WhatsApp > tap on Settings icon > Chats tab > See to make sure the "Save to Camera Roll" option is toggled on. Then follow these steps to copy the WhatsApp photos from iPhone 12 to your computer.
Transfer WhatsApp Photos From iPhone to Windows PC
- Step 1: Connect your iPhone to Windows computer using lighting to USB cable.
- Step 2. Unlock your iPhone by entering your Lock Screen Passcode or using Touch/Face ID (your data will not show up on your computer if you do not unlock your phone).
- Step 3. Now, open up the File Explorer on your Windows PC and click on your iPhone from the left-side menu.
- Step 4. Next, double click on the Internal Storage folder.
- Step 5. Now select all the folders that you see, and once the folders are selected, drag and drop the folders onto your desktop.
- Step 6. Wait for your Windows computer to finish transferring all the photos and once the transfer process has been completed, you can unplug your iPhone from your PC.
That’s it, all your WhatsApp photos along with any other photo in the Photos app has been downloaded onto your computer.
Transfer WhatsApp Photos From iPhone to Mac
- Step 1. Connect your iPhone to Mac using lighting to USB cable.
- Step 2. Unlock your iPhone by entering your Lock Screen Passcode or using Face/Touch ID.
- Step 3. Next, open the Photos app on your Mac (in case it does not automatically open).
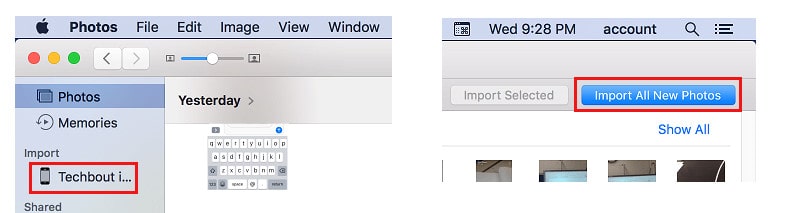
- Step 4. On the Photos App, click on your iPhone as it appears in the side menu under “Import” section.
- Step 5. Next, click on the Import All New Photos button located at the top right corner of your screen.
- Step 6. Patiently wait for the Photos App to download all Photos from your iPhone to Mac.
Conclusion
There are two methods offered in this article. Compare the two methods, the second one can be realized only when you turn on the "Save to Camera Roll" option and more complex. Obviously the first one is the easiest method to transfer WhatsApp Photos from iPhone to PC by applying PanFone WhatsApp Transfer. Just download it!
Download
Win Version
Download
Mac Version