![]() Cross-platform transfer solution for all smartphone users to transfer content between Android and iOS, transfer data from iTunes, iCloud, iTunes library to mobile phone.
Cross-platform transfer solution for all smartphone users to transfer content between Android and iOS, transfer data from iTunes, iCloud, iTunes library to mobile phone.
How To Downgrade From the iOS 13 to iOS 12 Without Data-loss
Updating to the latest iOS 13 can have a lot of advantages and enjoy the new features in advance, but due to the unstable operating system, some of users want to downgrade from iOS 13 to the previous stable iOS 12.3.1/12.3/12. Recently, there are users reported that they are experiencing the data loss issue during/after downgrade. In this article, we will guide you on how to downgrade from iOS 13 without losing any data.

Step One: Make a backup for current data.
Run backup tool-- PanFone Data Transfer and connect iPhone with your computer
Choose "Backup" and browse your computer to choose a folder to store your data.
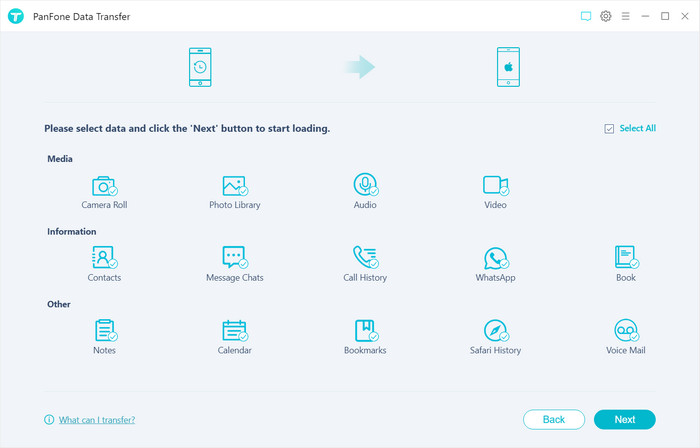
Select files to backup. The data could be:
- Media(Camera Roll, Photo Library, Audio, Video)
- Information (Contacts, Message Chats, Call History, WhatsApp, Book)
- Others(Notes, Bookmarks, Safari History, Voice Mail)
For detail steps, please visit How to make an archived backup of your iPhone
Step Two: Downgrade from iOS 13
To revert your device running the beta of iOS 13 or iPadOS back to the standard version of iOS, you’ll need to use iTunes for Mac or Windows and put the iOS device into Recovery Mode.
1. Turn off your iOS device by choosing Settings → General → Shutdown. Alternatively, follow the steps for your specific device:
- Face ID devices: Hold the Power button (also called the Top button) and either Volume button until the shutdown screen appears, then drag a finger across the slider.
- iPhone 8 and iPhone 8 Plus: Hold down the Power button (also called the Side button) until the shutdown screen appears, then drag your finger across the slider.
- All iPod touches, Home button iPads, iPhone 7 and older: Press and hold either the Side or Top button until the shutdown screen appears, then drag across the slider.
2. Launch iTunes on the computer.
3. Put your iOS device in Recovery mode by following the steps for your model:
- Face ID iPads: Connect your powered-down device to the computer while holding the Top/Power button and keep holding it until you see the Recovery mode screen.
- iPhone X and iPhone 8 or later: Connect your powered-down device to the computer while holding the Side/Power button and keep holding it until you see the Recovery mode screen.
- iPhone 7, iPhone 7 Plus and iPod touch (7th generation): Connect your powered-down device to the computer while holding the Volume Down button and keep holding it until you see the Recovery mode screen.
- Home button iPads, iPhone 6s and iPod touch (6th generation) or earlier: Connect your powered-down device to the computer while holding the Home button and keep holding it until you see the Recovery mode screen.
4. When you see the option to Restore or Update in iTunes, choose Restore.
5. Click Restore and Update to confirm.
6. Click Next on the Software Update screen.
7. Click Agree to accept the Terms and Conditions.
iTunes will download the latest stable iOS software, which can take anywhere from a few minutes to half an hour or more, depending on your Internet connection and other factors. If the iOS device exits the Recovery mode screen, let the download finish, then repeat 3.
When iTunes finishes downloading the software, your device will be wiped clean and the iOS install process will kick off. It’s perfectly normal for your device to reboot a few times during this phase. Don’t disconnect the device from the computer until iTunes has finished restoring it.
Step Three: Get Your Data Back
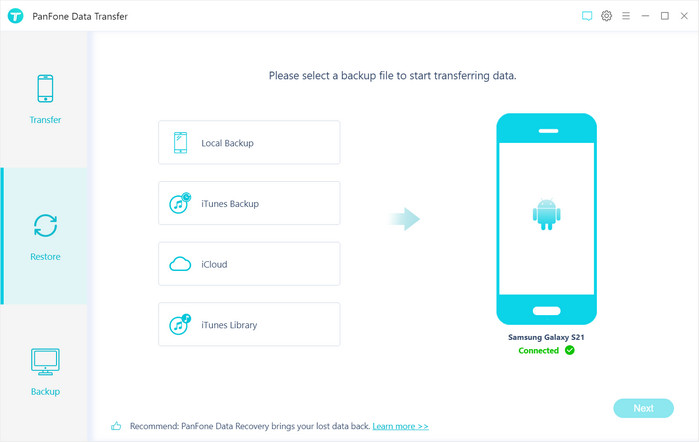
- Launch PanFone Data Transfer again. Select "Restore" mode on the main interface.

- Connect your iPhone with computer and select "Syncios Backup". Click "Next" and PanFone Data Transfer will list all backups you made. Choose a backup file from list, then tap "OK".
- Then check the file type you want to get back from the backup file.

The program begins to transfer the backed up file to your mobile phone. When it finishes, you will see the successful window.
Above are entire processes of downgrade from iOS13 without data-loss. It gives you the precise procedure to how to retrieve data. If you have encountered the similar issue like data loss during/after downgrade, it will be a helpful solution. The tool used in this guide is PanFone Mobile Data Transfer.
Features of PanFone Mobile Data Transfer
PanFone Mobile Data Transfer -- 1-Click to Sync One Phone to Another, Easy, Safe and Fast.
- Transfer files between Android and iOS, including contacts, photos, music, SMS, and more.
- Backup phone data and restore in lossless quality.
- Recover iTunes/iCloud backup to iOS or Android devices.
- Sync media files from iTunes Library to devices.
- Compatible with Android 11 and the latest iOS.
