2 Ways to Transfer Photos from OnePlus 9 to Computer
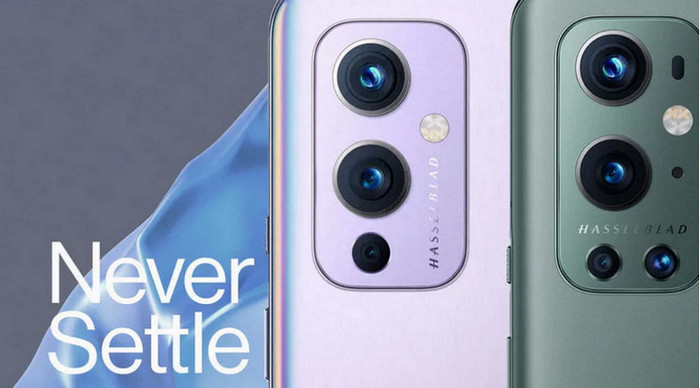
OnePlus’s next-generation flagship OnePlus 9 series is ready to go. They are very likely to be equipped with competitive camera settings and become OnePlus’s first truly outstanding camera phone. When you finally get a new OnePlus 9 and take thousands of precious photos, and you might need to transfer pictures from OnePlus 9 to a computer or laptop for a backup or freeing up space.
Now you can read further to learn two different yet effective ways to transfer photos from OnePlus 9 to the computer. Then you can select the method that most suits your need.
 Way 1. Selectively Transfer Certain Photos from OnePlus 9 to Computer for Free
If your photos are of great importance to you, you shouldn't store them only on OnePlus 9. Your device can be easily lost or it can accidentally break down. Together with it every captured moment of your life will be gone. We suggest you select the precious photos to back up. PanFone Mobile Manager is such a good option, which helps you selectively transfer pictures from OnePlus 9 to computer for a backup. More importantly, it allows you to import the photos from computer to OnePlus 9 whenever you need it. Besides, it also helps you to manage, import, transfer, delete other files like music, videos, contacts, etc, on OnePlus 9.

PanFone Mobile Manager
PanFone Mobile Manager is a reliable phone data management tool that enables you to manage, transfer and back up data like videos, SMS, music, photos, contacts, audios, and more.
- Easily transfer music, photos, videos, contacts, and more between iOS/Android devices and computer.
- Back up all the important mobile phone data on PC avoiding loss of data.
- Restore the backup to your mobile phone with one click.
- Handy Toolkit: 1-Click Backup, 1-Click Recovery, HEIC to JPG Converter, Photos Compression, Ringtone Maker, etc.
Here are the simple steps to export certain photos from OnePlus 9 to computer:
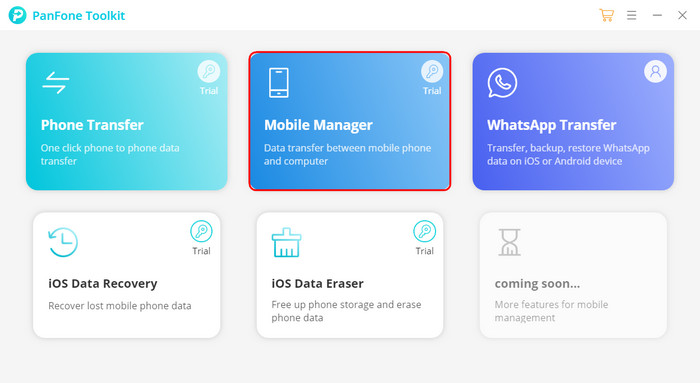
Step 1: On the start-up interface of PanFone Toolkit, please choose Mobile Manager to install PanFone Mobile Manager. After the installation, just tap Mobile Manager again to launch PanFone Mobile Manager.
Step 2: Connect your OnePlus 9 to the computer via a USB cable.
Note: You might need to enable USB debugging mode on the OnePlus phone to allow PanFone to connect it. If you encountered the Android detection problem during the process, please click here to get help.
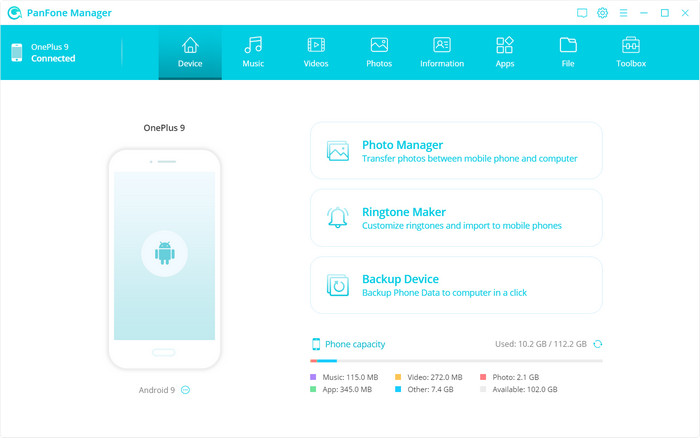
Step 3 : Select photos or albums you want to transfer to your computer.
- Export the photo album from your OnePlus 9 to the computer.
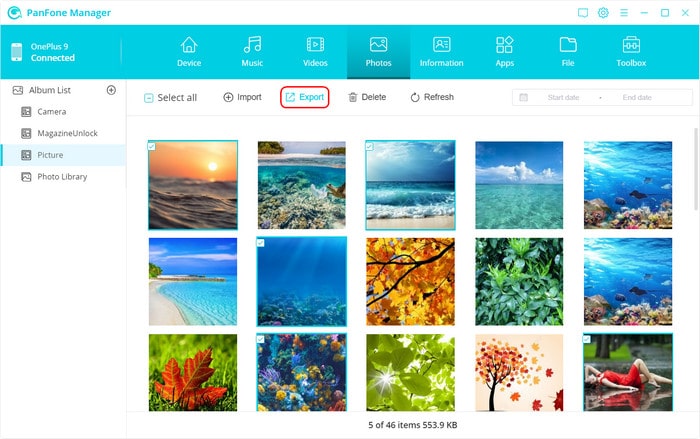
Once PanFone detects your OnePlus 9 successfully, just navigate to the Photos tab, you will see all albums on your phone. Simply right-click a certain album and then select the Export option to transfer the photo album to your computer.
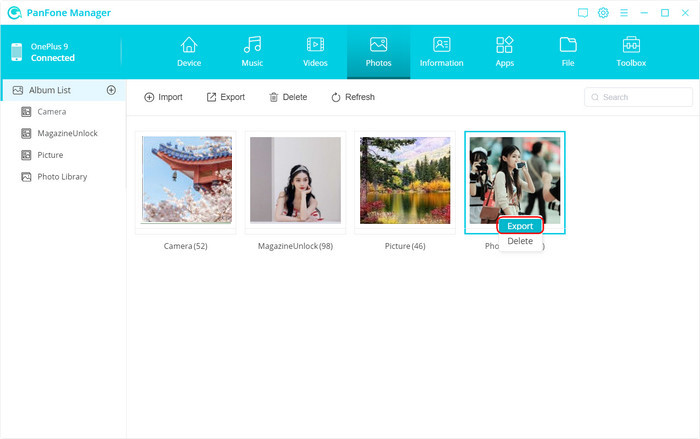
- Export specific photos from your OnePlus 9 to the computer.
If you want to back up certain photos from OnePlus 9 to the computer, you should double click the specific album or simply click on Album List from the left-hand of the interface to open an album. Now select multiple photos you prefer to transfer to your computer and tap on the Export button on the menu bar to start the transfer process. Please wait patiently and it may take some time, depending on the amount of data you transfer.
 Way 2. One-click to Transfer All Photos from OnePlus 9 to Computer
To get the job done easier and faster, we would like to recommend you to transfer all photos from OnePlus 9 to computer in one click using PanFone Data Transfer. It is an all-in-one phone transfer aim at data transfer, backup, and restore, which enables you to copy all photos from your OnePlus 9 to the computer in a few simple clicks. With a user-friendly interface, the process is hassle-free, and an easier one. In addition, you are able to back up contacts, message chats, call history, application, video, music, and so on from your OnePlus 9 to the computer. Furthermore, you can restore the backed-up data like photos from your computer to the OnePlus 9 anytime anywhere.

PanFone Mobile Data Transfer
PanFone Data Transfer is a one-click solution for you to sync data between iOS & Android, restore iTunes and iCloud data to device conveniently, as well as back up your phone data and restore later.
- Transfer files between Android and iOS, including contacts, photos, music, SMS, and more.
- Backup phone data and restore in lossless quality.
- Recover iTunes backup, iCloud data to any supported iOS or Android device.
- Sync media files from iTunes Library to devices.
How to back up all photos from OnePlus 9 to computer:
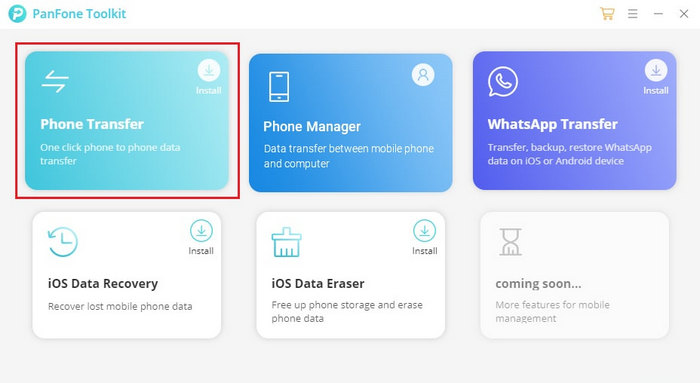
Step 1: This time, just go to PanFone Toolkit > Phone Transfer to install PanFone Data Transfer. After the installation, tap Phone Transfer again to run PanFone Data Transfer.
Step 2: Get your OnePlus 9 connected to the computer via a USB cable or Wi-Fi and PanFone would recognize your phone automatically.
Note: We really recommend you choose the USB Cable connection mode since it is more stable and faster. You might need to enable USB debugging mode on the OnePlus 9 to allow PanFone to connect it. For any phone detection problems, please click here for help.
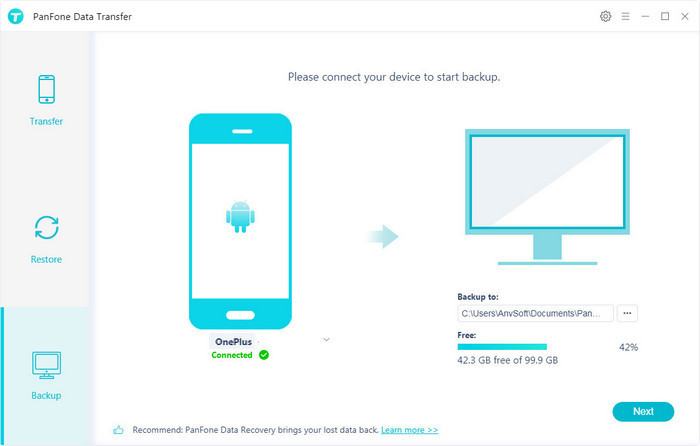
Step 3 : There are three modes on the main interface: Transfer, Restore, Backup. Simply Navigate to the Backup mode and then click on the Next button to continue.
Step 4 : Tick off the Camera Roll and the Photo Library on the checkbox, then click on the Next to start loading photos.
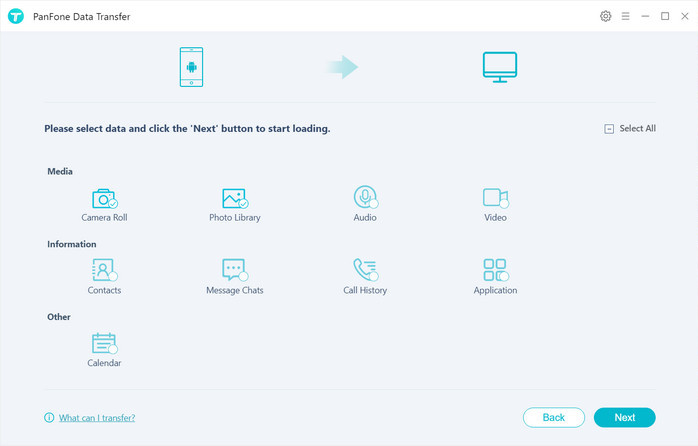
Once the loading process is done, click on Next to start the backup process.
Note: Do not disconnect the phone from the computer during the whole data transfer process.
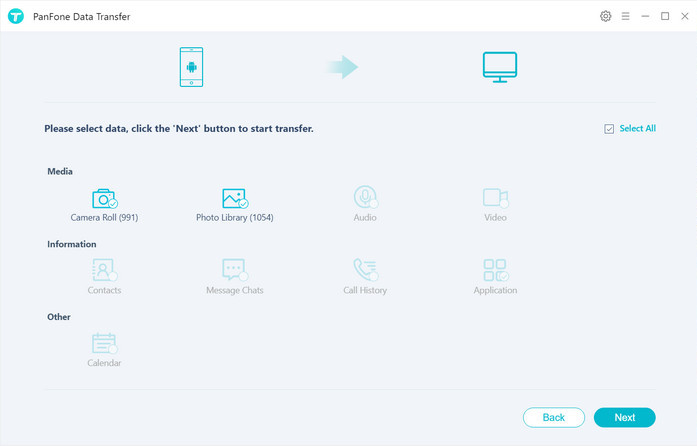
All photos will be transferred from your OnePlus 9 to the computer within minutes.
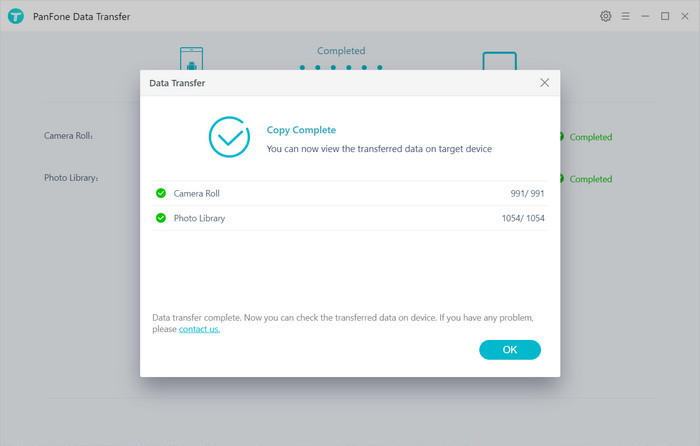
That's all. The above-mentioned are two easy ways you can use to move photos from OnePlus 9 to computer or laptop. If you are looking for an optimal solution that can not only help you move photos, but also manage and edit phone photos, then PanFone Mobile Manager is an ideal tool. If you have too many photos on your OnePlus 9, you can choose PanFone Data Transfer to do the transfer job.
Related Post
Hot Product
-
🔐 Passcode Unlocker
Unlock screen, Apple ID, or Screen Time passcode on any iOS device.
Learn More
-
📍 Location Changer
Spoof your GPS location for apps, games, and privacy protection.
Learn More
-
↩️ Data Recovery Expert
Recover deleted or lost data from PC drives and external storage devices.
Learn More
