How to Transfer Photos from iPhone to a Windows 10 PC without iTunes
If you have an iPhone 11/11 Pro and Windows 10 PC, you probably would like to know how to transfer photos from the iPhone to the computer. There are several ways to quickly copy files to the PC, and we’ll show you three of the best approaches using the PanFone Data Transfer, Windows Explorer and PanFone Mobile Manager to directly import photos from iPhone to the Windows 10 PC.
 Method 1: Use Free Mobile Phone Manager
PanFone Free Mobile Phone Manager is a free tool that can help you to transfer certain photos you prefer from your iPhone to the computer. You can preview the photos in it and transfer photo so easily with 2 steps. At first, download and install this Free Mobile Phone Manager on your computer.
Step 1 : Run this program and get your iPhone connected to the computer. Connect your iPhone with a USB cable and PanFone would detect your device automatically.
Step 2 : Select photos or albums you'd like to transfer to your computer. You can transfer all photo albums to your computer or transfer photos selectively.
* Export the photo album from your iPhone to the computer.
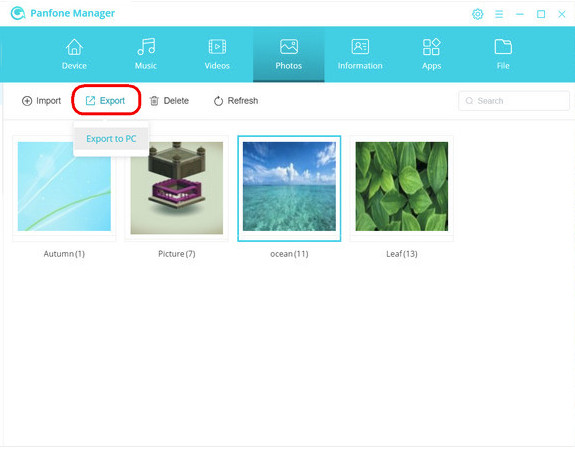
Once your iPhone is connected successfully, clap "Photos" tab. All albums of the iPhone will be listed. Simply select the certain album and then click on "Export" button. The photo album will be transferred to a computer.
* Export specific photos from your iPhone to the computer.
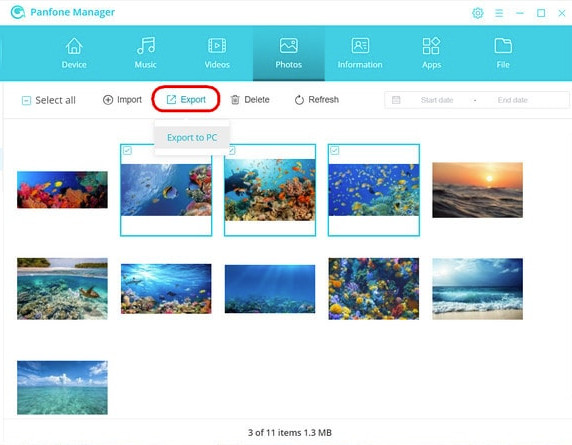
Open one specific album. Select multiple photos and click on "Export" button on the menu bar. Then do the same operation as we mentioned above.
 Method 2: Use Windows Explorer to Transfer Photos from iPhone to Windows 10
If you don’t want to use the Windows Photos app, you can also use Windows Explorer to manually copy pictures over to your computer just like you would from a memory card or other disk.
- Open Windows Explorer and navigate to “This PC” in the sidebar
- Choose the name of your iPhone from the sidebar menu
- Open the “Internal Storage” directory, and then open “DCIM” to access photos
- Select all folders and files if you want to copy all pictures, then right-click and choose Copy (or use the tool bar Copy)
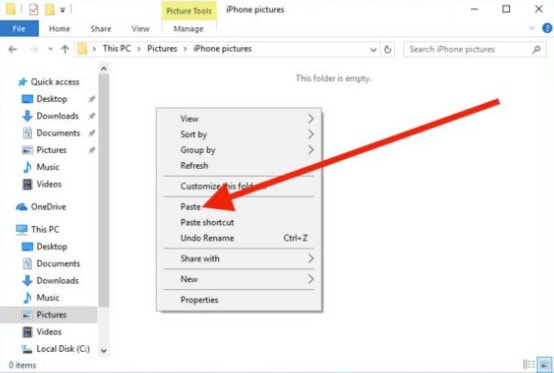
- Next, navigate to a folder like "Pictures" or "Documents" and, optionally create a new sub-folder, then use the “Paste” command to import the pictures from iPhone to the Windows 10 PC via Windows Explorer file system
 Method 3: Transfer All Photos with One-click from iPhone to Windows 10
If you do not want to transfer photos selectively, here is another way to copy all photos on iPhone to a Windows 10 PC at one time. Here is another tool -- PanFone Mobile Data Transfer
PanFone Mobile Data Transfer is a tool designed for transferring data among iOS devices, android devices, iCloud, iTunes and computer. You can download it by clicking the following button.
Steps to transfer photos from iPhone to Windows PC:
Step 1 : Start PanFone Data Transfer and connect your iPhone to the computer. Connect your iPhone to the computer via USB cable and PanFone would recognize your phone automatically.
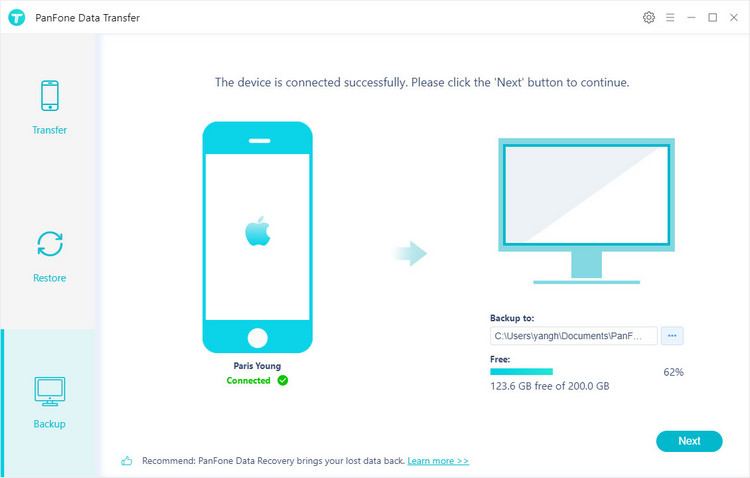
Step 2: Select the "Backup" option to bring up the one-click backup panel.
Once your iPhone gets detected, simply select the Backup option and then click on Next button.
Step 3 : Tick off "Camera Roll" and "Photo Library" on the check box, then click on "Next" to start loading.
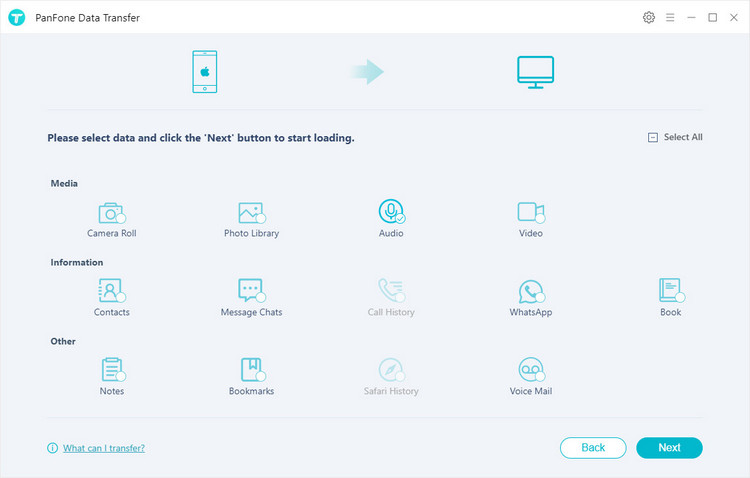
After the loading process is complete, click on "next" to start the backup process.
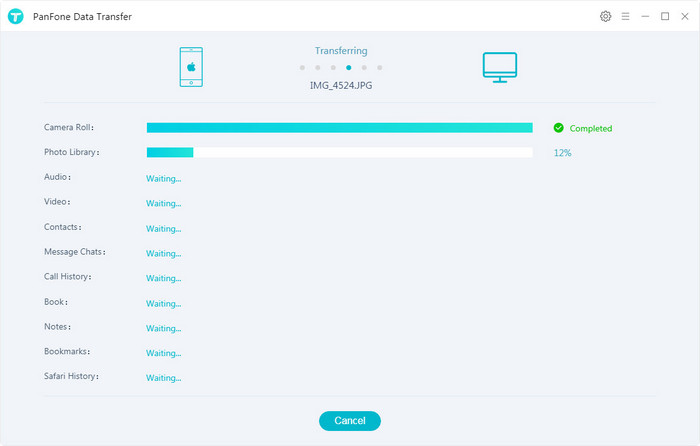
After a while, all photos will be transferred from your iPhone to the computer.
Conclusion: The above are three methods to transfer photos from iPhone to Windows 10. And the first two methods require you to select the photos you want to transfer while the last one is more convenient. You can transfer all photos on your iPhone to a Windows 10 computer with one-click. Download and try PanFone Mobile Data Transfer now!
Related Post
- How to Transfer Video from iPhone to a Windows 10 PC
- How to Recover Overwritten Video Files on iPhone
- 5 Best iPhone Data Recovery Software for Windows and Mac in 2024
- How to Recover Deleted Data on iOS 13 Devices with or without Backup
- How to Transfer Photos from Your Old iPhone to New iPhone 11/11 Pro/11 Pro Max
- 2 Ways to Recover Deleted WhatsApp Videos on iPhone XS/XR/X/8/7/6s
- How to Recover iPhone Data from iCloud Backup
- How to Selectively Recover Deleted/Lost Voice Memos from iPhone without Backup
- 3 Ways to Recover iPhone Data after Factory Reset
Hot Product
-
🔐 Passcode Unlocker
Unlock screen, Apple ID, or Screen Time passcode on any iOS device.
Learn More
-
📍 Location Changer
Spoof your GPS location for apps, games, and privacy protection.
Learn More
-
↩️ Data Recovery Expert
Recover deleted or lost data from PC drives and external storage devices.
Learn More
